Howto & Guides, PC Guides
Can Soft15khz make MAME more authentic?
We all love MAME and how it lets us play arcade games that would otherwise cost a fortune to track down in their original cabinets. However, many of you will have probably wished MAME games looked a little more authentic. The scaling in MAME simply isn’t up to the standard of the XRGB3. Sure, there are filters that you can apply, like Scale2x, and while they can look OK on some games, they are hardly authentic. Wouldn’t it be nice to have MAME games scaled through an XRGB? Perhaps you want to go one better and get yourself an arcade cabinet and a proper 15khz monitor? Try hooking a regular PC to a monitor like that and at best you’ll get a screen full of garbage and at worst you can damage the monitor. What is needed is some way of getting your PC to output the old resolutions that the arcade machines themselves ran at. That way, any upscaling (if needed) can be done by an external processor, or the picture can simply be output on a compatible display. You’re certainly not going to be able to do that using the regular videocard drivers however, but with a free solution called Soft15khz you just might.
15khz – The hows and the whys in a nutshell
If you’re interested in the science behind how and why scaling/processing of an image is necessary for MAME to display games on modern monitors, you might want to read this excellent article over at Ultimarc. For the rest of you, you need to understand some basic facts. Older videogames run in screen resolutions and refresh rates that are simply not compatible with newer monitors. Since these screenmodes are not compatible, PC graphics cards don’t offer them as an option. To remove this limitation, we need to do two things. Firstly, find a compatible display or processor that can handle the original 15khz signal. In my case, I’m using my XRGB3, which is designed to take this incompatible signal and display it on more modern displays, hopefully making a nicer job of it than MAME does on its own. The other option, for an even more authentic result, is to use an actual arcade monitor. This is more difficult to get working but certainly worth the effort.
The second thing we need is some way of making the PC output the old 15khz signal, and that’s where Soft15khz comes in. Soft15khz isn’t the only solution, you could opt for an ArcadeVGA card instead. This is a specially modified graphics card that supports 15khz screen modes directly. Note that I’ve not tested the ArcadeVGA personally, but I can imagine it would produce better results than I got from using Soft15khz. Of course, many of you will have all the necessary bits lying around to try Soft15khz for yourselves (just like I did), so you can always try the free option first.
Before you begin
Soft15khz is easy to set up, but maybe not so easy to configure. When your PC is outputting a 31khz signal (as normal) not only is it incompatible with arcade monitors but it could even damage them. If you’re using something like an XRGB videoprocessor then you won’t damage it but you may simply see a blue screen if you send an incompatible screen resolution. Of course, feeding a 15khz signal into your regular PC monitor won’t work either. You might need to do a lot of cable swapping in order to get everything working just right. Some prior planning to minimize frustration and even potential damage to your equipment is a good idea. At the very least, you should probably attach a short extension cable from your monitor or video processor while you test, so that you can swap cables frequently without putting undue wear and tear on the monitors actual connectors. You might also want to try some of the following ideas:-
Use a VGA switch:- Connect the output of your graphics card to two monitors with a VGA switch. This will let you kill the output quickly if you send an incompatible signal to your arcade monitor.
Use a VGA splitter:- You could use a VGA splitter to split the output from your graphics card to two different displays or monitors. I do not recommend this however, as VGA splitters may not work with 15khz signals at all.
Clone mode:– If your graphics card has two VGA outputs, you can use clone mode to display the same picture to two monitors. Note however that installing/reinstalling Soft15khz will reset the graphics card back to single display only.
VNC/remote desktop server and home network:- This is an ideal solution that can make configuring 15khz setups much easier. Rather than swap the monitor back after you lose the picture, simply install a VNC/remote desktop package on your PC before you begin. If and when you find you cannot see your desktop, simply connect remotely through the network, change the appropriate settings and then try again. A program like UltraVNC works nicely on Windows XP and will save you a lot of time and hassle.
Finally, remember that Soft15hkz is only compatible with Windows XP. You can configure XP as a second boot option or simply recycle an old PC as a 15khz gaming system.
Using Soft15khz
If you’ve ever looked into other utilities for programming custom screen resolutions, such as Powerstrip, you might have expected Soft15khz to be extremely complicated. However, using the software is actually very easy. Just download the Soft15khz program and unzip it. Before you start playing with Soft15khz, you should download the Qres utility too (which is available on the same page). Unzip Qres and add it to your startup programs, so that it runs everytime Windows XP starts. Qres opens in the system tray/notification area in Windows, and left clicking on it instantly brings up a list of available screen resolutions.
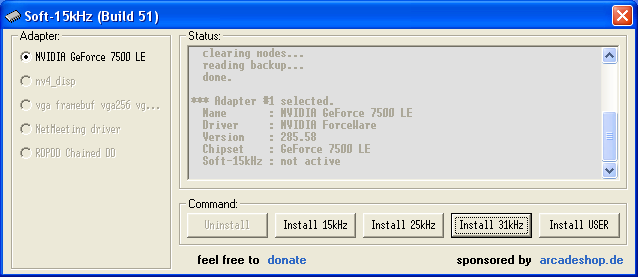
With Qres unzipped and running on start up, test your VNC or remote desktop solution, if you intend to use one, then start the Soft15khz executable, you will then see the following screen:-
Now, click on “Install 15khz”. You can click on the other buttons too if your display is compatible. Next, set your desktop to 640×480 (using Qres) and then shut down your PC. Disconnect your regular PC monitor and attach your 15khz compatible device. If everything goes according to plan, you should then be able to power on your PC (be careful when it starts to boot as it will display a 31khz screen!) and when Windows has loaded, you should have a 15khz desktop.
Testing and configuring
Before you dive into running MAME or another emulator, you will want to test each resolution to see which ones work and which do not. Once you know a resolution doesn’t work, you can remove it from the list. Click the Qres tool icon in the system tray. You should now see a list of new resolutions. Click on a resolution to try it. If it does not work, press the escape key to cancel. Note that the XRGB3 appears to have a bug (surprise surprise) where some screen modes will work one time then strangely fail when you try them again, so before writing off a screen mode you really want to use, try it a couple of times.
To remove a non-working screen mode, open Notepad or your text editor of choice. Create a file called custom15khz.txt (or custom25khz.txt or custom31khz.txt if you’re playing with those resolutions). Now, add the line “remove xxx,yyy” (without the quotes of course) where xxx is the horizontal and yyy is the vertical resolution. So if 320×240 doesn’t work, you’d simply add the line “remove 320,240”. Save this file in the same directory as Soft15khz. Run Soft15khz again and click “Uninstall” and then reinstall the screen modes as before. Now, reboot your PC.
Running MAME
Once you’ve got rid of all the resolutions that don’t work, you can proceed to run MAME. Pretty much any version of MAME will do, but you will need to change a few settings first before things will work. The most important thing to do is change MAME from Direct3D to DirectDraw. If you don’t, your computer will crash horribly and restart. There are a few other settings you should change too; Turn “Hardware Stretching” Off and make sure “Switch Resolutions to fit” is enabled. Wait for vertical sync, sync to monitor refresh and triple buffering should all be disabled too, though if you get screen tearing, you might have to re-enable triple buffering.
Running other emulators
For other emulators, you will want to carefully consult the documentation that comes with them. You’re looking for a way to disable Direct3D or any other scaling or stretching. Some emulators will run fullscreen at whatever the desktop resolution is set to, meaning you can use Qres to set the resolution then you are good to go. If the picture looks blurry its probably due to incorrect scaling/stretching that you haven’t disabled properly.
Screenshots, and is this all worth it?
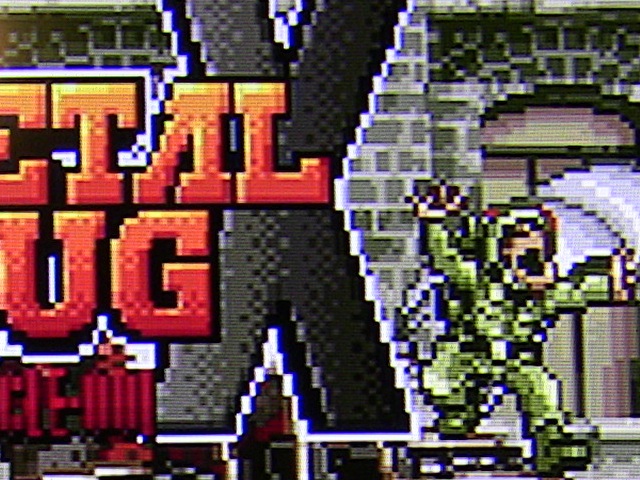
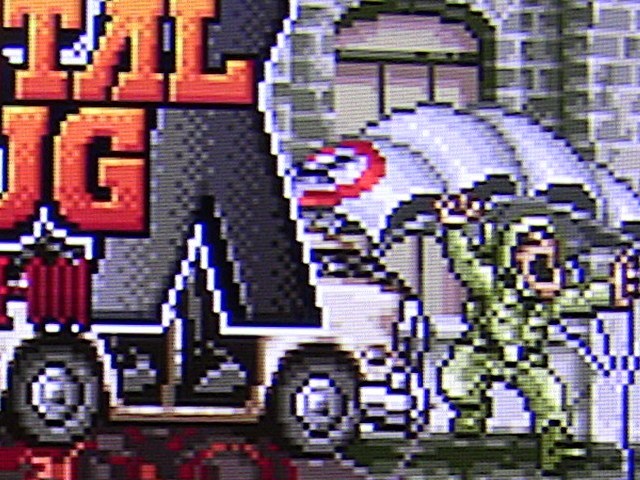
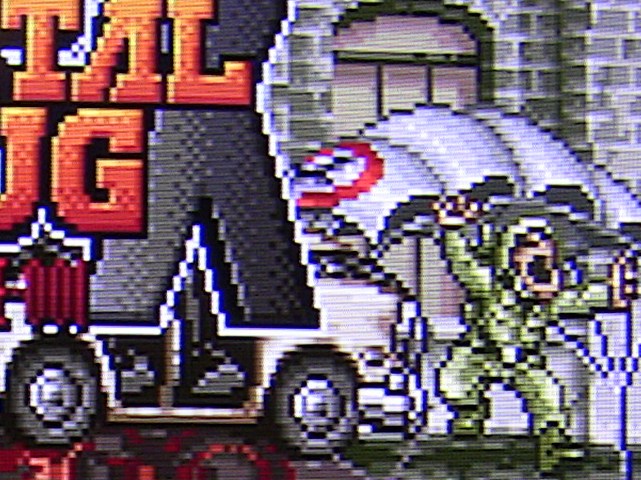
Despite my best efforts, I was not able to get my 15khz setup working satisfactorily. While everything looked great while the image was still, when things started to move it was a different story. Screen tearing and stuttering were common in every emulator. This is probably due to the irregular refresh rates that the graphics card seemed to be producing. The ArcadeVGA card claims to tackle this problem, so if I get a chance to test it in future I’ll report back. Below are some screenshots of the game Metal Slug X, showing various different scaling options. Keep in mind that I don’t have a capture card, so all I can offer you are some digital camera shots of the screen.
 Above:- This is MAME’s native scaling to 1080p. Really, for Metal Slug this looks pretty good, though the picture is significantly softened compared to the real thing.

Above:- this is MAME scaling the image to 640×480, with the DVDO Edge scaling to 1080p. There’s not a huge amount of difference between this and the previous picture, in my opinion.
 Above:- here we have the same setup but with the SLG3000 providing scanlines. This is pretty pleasing really. Certain other games just don’t look right with this kind of smooth scaling however.
 Above:- here we’ve turned off the bilinear filtering in Direct3D. The result is this mess of pixels, though I suppose you could claim it was closer to the original.
 Above:- here we have Soft15khz outputting at (close to) the games native resolution. The upscaling is now done with the XRGB3 in B1 mode, which is then fed into the DVDO Edge. A very pleasing result if the authentic look is what you are after.
Again this is the same as the picture above but using the XRGB3’s built-in scanline engine this time.
It’s a real shame, in light of the excellent results I got on still images, that the whole system fell apart once the image started to scroll. Of course, just because the graphics card (a G-Force 7500 LE) I used produced poor results, doesn’t mean that other cards would not perform better. The question still remains, is it worth the effort to output emulated games in 15khz? Let’s put personal preference aside for a moment and assume you want to do this because you don’t like the Direct3D or Scale2x etc look that you get on a regular monitor with regular MAME settings. Keeping that in mind lets consider the following scenarios:-
1) You have an arcade monitor you want to use with MAME – There’s no two ways about it here, you are going to need some way of getting 15khz from your PC. In this instance it comes down to deciding between Soft15khz and an ArcadeVGA card. If you have the option of trying Soft15khz for free, like I did, then go for it, you can always buy an ArcadeVGA later if things don’t work out. An ArcadeVGA also includes hardware to protect your monitor from receiving an incompatible 31khz signal. You could always just switch the monitor off as the PC boots though.
2) You have a videoprocessor like the DVDO Edge – Not worth going 15khz, the Edge’s handling of 15khz/240p video isn’t better than what MAME can do. This is especially true now that pixel shaders and HLSL are a part of MAME. Although HLSL setup can be fiddly, it produces results that are far better than using an external scaler. If your PC is too slow to use HLSL, you may find that outputting 640×480 VGA through a scanline generator and then into the DVDO Edge (or directly into your display) produces a more pleasing result.
3) You have a XRGB series video processor – Maybe worth going 15khz, depending on what other equipment you also own. Not really worth doing now in light of new developments in pixel shading / HLSL. If you like scanlines, the XRGB3 can add perfect scanlines to the 15khz output. However, lets not forget you can now purchase a SLG3000 and add perfect scanlines to a 640×480 image as well. It will basically come down to how pleasing you find the upscaling of the VGA image on your TV or monitor, and if you run into the same problems with stuttering/tearing that I did.
Back from Soft15khz Experiment to Home Page


My Quadro 6000 graphics card allows me to select 240p 15khz as a custom resolution. I don’t know if this is the same with other proffesional GPUs but it definitely works on the 6000.
I was even able to make the 240p image display on an old 4:3 lcd projector for a while but it didn’t look that great.
I always thought that 240p was achieved on old machines by manipulating a 480i signal to show the same image on both sets of lines while leaving a scanlines blank in between each one. In order to get 240 lines of image plus 240 black scanlines, wouldn’t the signal need to be left at 480i. If you output 240p, are you not forcing it to cut the spaces in between lines and causing a jaggy image?
I never understand if the black scanlines are in the signal output by the machine or just as a result of only filling 240 of the 480 available lines. If it is the latter, where is the instruction to alternate between blank scanlines and ones with the image coming from? Is that instruction still present in the code in the mame roms that I use or was it part of the game consoles that I used to use and therefore missing on my current pc set-up.
It seems odd that this soft 15khz software didn’t work properly. One would think that it was outputting exactly what an old CRT monitor would cope with best.
Are you sure it’s 320×240 15khz as that wouldn’t work with 99% of PC monitors. Soft15khz didn’t work for me because I was using upscalers not a genuine CRT monitor.
You’re completely correct about how the 240p 15khz mode works, scanlines appear because both odd and even fields are the same. This is exactly what Soft15khz causes your graphics card to do. This is different from the 320×240 modes old DOS games used to support.
How did the old 320 x 240 dos modes differ?
I think the more modern qvga 240 x 320 resolution that is used mobile devices with small screens, works differently to the old 15khz standard. It is designed for fixed pixel displays so it will have 240 lines but with no blank lines left in between. To achieve a similar effect on a fixed pixel display, you would need a native 480p panel and then use software to instruct it to leave every other line blank (which I guess is what mame does with fake scanlines). The problem is that most modern displays have 1080 lines so it needs to scale it to fit (which makes it look terrible).
You’re right, the old DOS modes and the new mobile resolutions of course don’t use the same pseudo 480i trickery and therefore don’t have scanlines. Well scaled 240p actually looks very nice, see the XRGB series of scalers for an example.
Thanks for the heads-up on that Jebby. I will also update this article with a link to my article on the new HLSL/OpenGL Pixel shaders that are slowly making their way into mainstream emulation. If you don’t have a proper arcade monitor I think these new pixel shaders are really the way to go. If you DO have a proper monitor though, things like Soft15khz and CRT_Emudriver will continue to be useful.
Great blog you have here, I strive for video game perfection too. I was using soft15khz for a while with MAME and it worked great but was mildly frustrating at times. Recently I discovered CRT_Emudriver (Its a hacked ATI driver so no good for nvidia). Not only is it slightly less of a pain to use, it also enables many more potential resolutions over the stock driver. Combined with another tool Arcade_OSD you can tweak each resolution in realtime so if your 240p image is slightly narrow or off center you can change it and save the changes. My only issue now (didnt seem to have with soft15khz) is that games with the lowest resolutions have artifacts (256×240 and under) which is too bad for NES games and such.