AV Guides, Howto & Guides
OSSC Pro’s Downscaling Delights
With three new video scalers coming onto the market in 2023/2024, it was inevitable that those of us who still have classic CRT televisions would want to evaluate not only their ability to upscale classic video game content but also their ability to downscale modern titles too. Out of all the new scalers, the OSSC Pro has the most flexible downscaling options right now, with its ability to output in a wide range of CRT resolutions, including 240p, 288p, 480i and of course 480p. Theoretically at least, any game can now be displayed on any RGB capable display, though don’t expect a particularly stellar Cyberpunk 2077 experience on your old bedroom 14 inch CRT. Looking beyond modern 3D titles, we can find many consoles now offering emulation of older games and many indie studios releasing pixel art style games. The prospect of seeing these games on the screens they were designed for (or at least inspired them) is a tantalising one.
Types of CRT
There were many different types of CRT display during the time of the electron gun and phosphorescent screen. For the purposes of downscaling we need to distinguish between widescreen and 4:3 aspect ratio displays. You also need to be aware that some screens can only display 31khz and others can only display 15khz. Determining if your display is widescreen or not is just a simple matter of looking at it. Is it boxier than the flat panel you currently use to watch TV?, then it’s 4:3. 4:3 CRTs were fairly common up until the late 90s, with many people still preferring them for television viewing or for use with their computers well into the 2000’s.
Determining if your display is 15khz or 31khz takes a bit more detective work, but isn’t terribly difficult. Typically consumer TVs, designed for watching broadcast television, are 15khz only. If your TV has a SCART socket, then it’s almost certainly 15khz only. If your monitor has a VGA connection then it’s almost certainly 31khz only.
There are some (usually much rarer) displays that can display both 15khz and 31khz. If your TV has a VGA or even HDMI input, or component inputs labelled “HD” then it may be a HD CRT that can accept both 15khz and 31khz signals. Certain professional video monitors are also capable of this. In this instance you might want to experiment with both 15khz and 31khz modes to see what looks best on your display.
Types of retro game
You can find lots of examples of pixel art retro games, or even emulated retro games on modern consoles. Some pixel art games, such as Shovel Knight or Axiom Verge, will use a pixel art style of graphics in widescreen, designed to look good on modern displays. Then there are those titles such as Gunlord or Xeno Crisis that are true pixel art games that started out as projects for real retro consoles. Typically these games will pillar-box the main play area and put a fancy border or even additional HUD on the left and right edges of the screen.
Depending on the CRT that you’re using, for a widescreen game you may need to letterbox the output, or apply some zoom to remove the pillar-box area for a true 4:3 game. Of course, not every pixel art or even every emulated game will scale itself correctly and some experimentation may be required to get the best results.
Getting it all going
To get started with downscaling, the first thing you will need is a converter to take the digital output of the OSSC Pro and convert it back to analogue. Usually this is in the form of a HDMI to VGA converter, or a HDMI to component video converter. Choosing the best converter is a bit of a minefield. While you only require basic functionality, unfortunately these converters tend to be inconsistent in their performance. Worse still, as manufacturers cut costs by choosing whatever the cheapest component is at the time, even two seemingly identical devices, from the same manufacturer and purchased from the same store, may perform differently.
Eventually, an add-on card for the OSSC Pro will allow the unit to output analogue video without the need of an external DAC, but until this time we’d recommend purchasing your DAC from a store with a no hassle returns policy. There’s some further discussion here if you still need help choosing one.
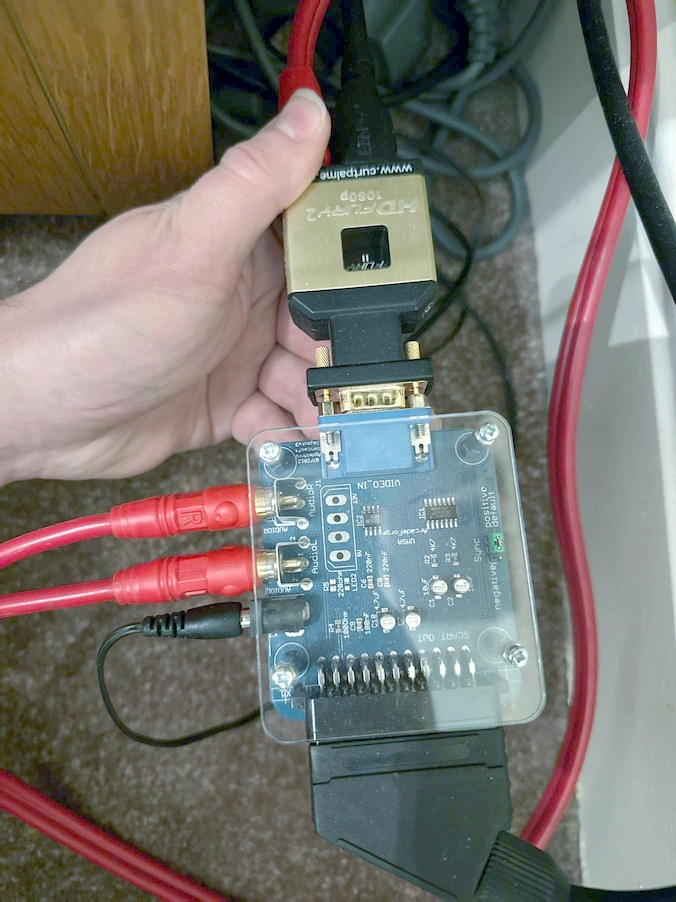
For a display with VGA or component video inputs this is usually all you need. If you’re using a SCART TV, however, it gets a little more complicated. Since SCART requires composite sync and blanking voltage, you will need to convert the output of a HDMI to VGA DAC into a composite sync (75 ohm voltage) SCART signal, with blanking voltage to enable RGB mode. For this you need a sync combiner. We have tried two such devices with OSSC Pro and they both work well. The first is the ArcadeForge UMSA (ultimate SCART adapter) and the second is the Beharbros Kenzei. Please note that we will have a better, easier option available in our store soon for 15khz CRT users.
Along with the analogue output add-on for the OSSC Pro, a simple break out adapter will also be available to provide the correct SCART voltages and signals from the DAC expansion board. If you are itching to get started right away, you can use either of the adapters mentioned above.
Setting up your OSSC Pro
Since there’s a very slim but nevertheless real chance of causing damage to a classic CRT by feeding an incompatible signal, you should be careful when first setting up your OSSC Pro for downscaling. Firstly, check that all of your cables are connected securely. If using a sync combiner, check that it is powered on. Power on your OSSC Pro before you power on the TV or monitor. If you’re using a 15khz only display, you should change the test pattern to 480i using the OLED display on the front of the OSSC Pro. Simply press the menu left button on the remote to do this. If using a 31khz only display, the unit should default to a 480p test pattern which is suitable for your display.
Turn on your display and make sure it is on the correct input, you should now see the OSSCs grey test pattern. If you do, you know that your cables are all connected and working and that your chosen resolution is compatible. Press the Menu button on the OSSC Pro’s remote and choose “Output Opt”. Now choose “Operating Mode” and change it to “Scaler”. Exit this menu using the back button.
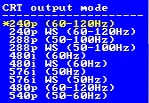
Your next stop should be the “Scaler Opt.” menu. Firstly, on this menu, make sure “Output type” (the third item from the top) is set to “CRT”. Now, we need to choose our CRT output resolution. Navigate to “CRT output mode” and press “OK” on the remote. The menu shown in the picture should then be displayed, listing all the available output modes. For a 15khz display you will be using 240p and 480i for the most part. Pixel art games tend to look best in 240p, but you might want to use 480i while setting up your console as it will be a little easier to read. The 288p modes can also look great on certain CRTs, allowing you to squeeze a little extra resolution and still get an authentic scanline look. However, it seems that most PAL TVs will only accept 288p modes at 50hz.
For a 31khz display we can choose either 480p or 540p. Typically for a 4:3 display you would choose 480p. Notice some of the modes have “WS” next to their respective names, denoting “widescreen”.
At this point you might want to save your profile to save you the bother of going through these setup steps every time. Note that saving the profile also saves the default test pattern, so if you have a 15khz TV you should definitely save your profile so that you aren’t feeding your display an incompatible signal every time you power on.
Case study – Xeno Crisis
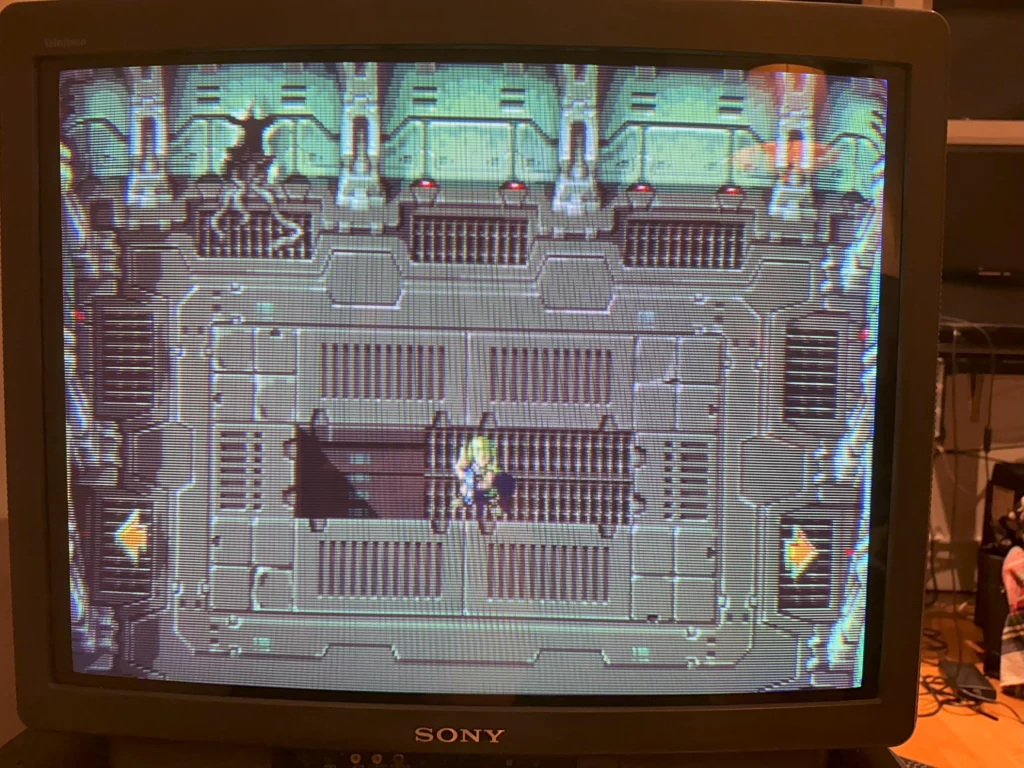
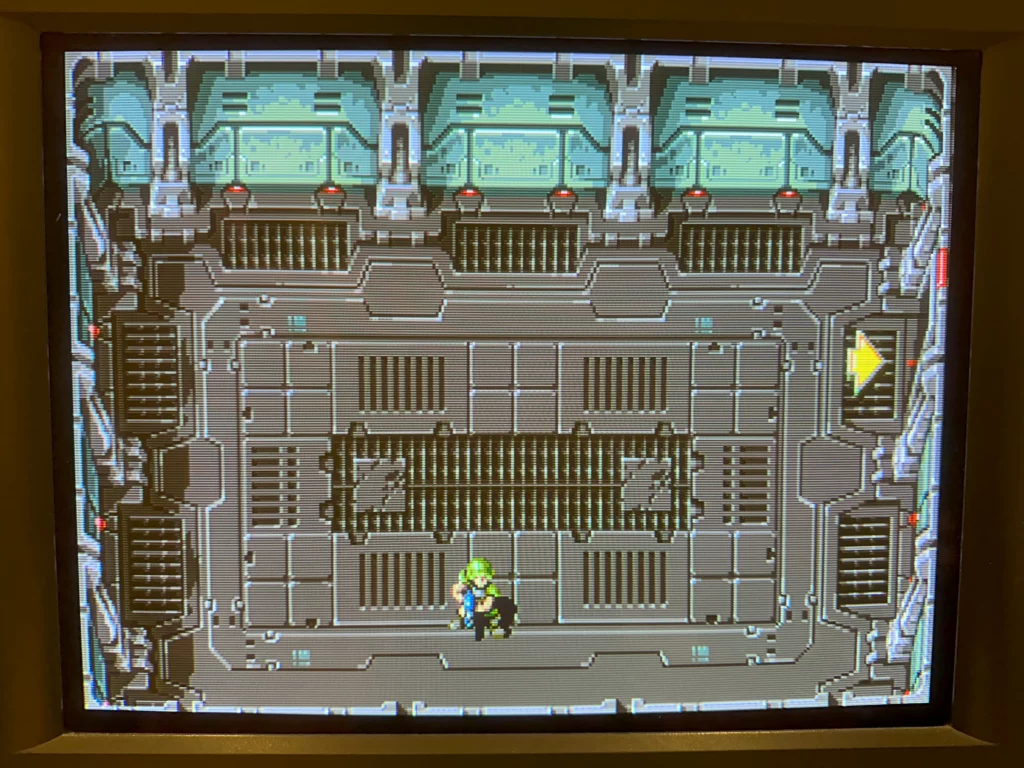
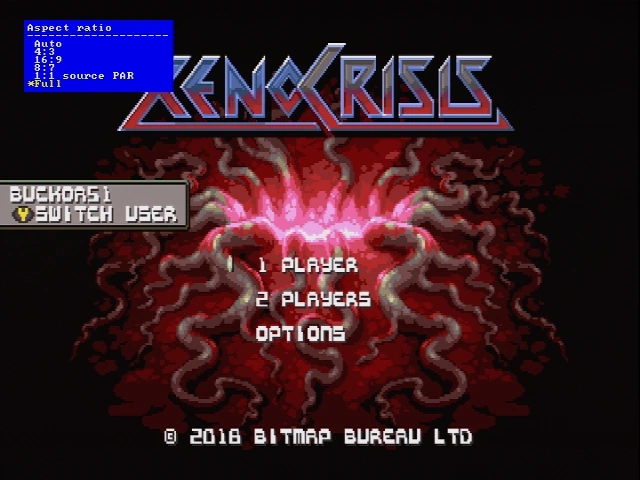
To dip our toes into downscaling, we’re going to be looking at this 2019 multi-directional arena shooter game developed by Bitmap Bureau. This game was developed initially for real retro hardware, specifically the venerable Sega Megadrive/Genesis. That means that the games graphics are true, integer upscaled 240p assets, making it a great choice to downscale back to 240p. On a modern console, the widescreen area is used to display remaining lives, ammo etc, nothing we can’t live without. Here’s how that looks:-
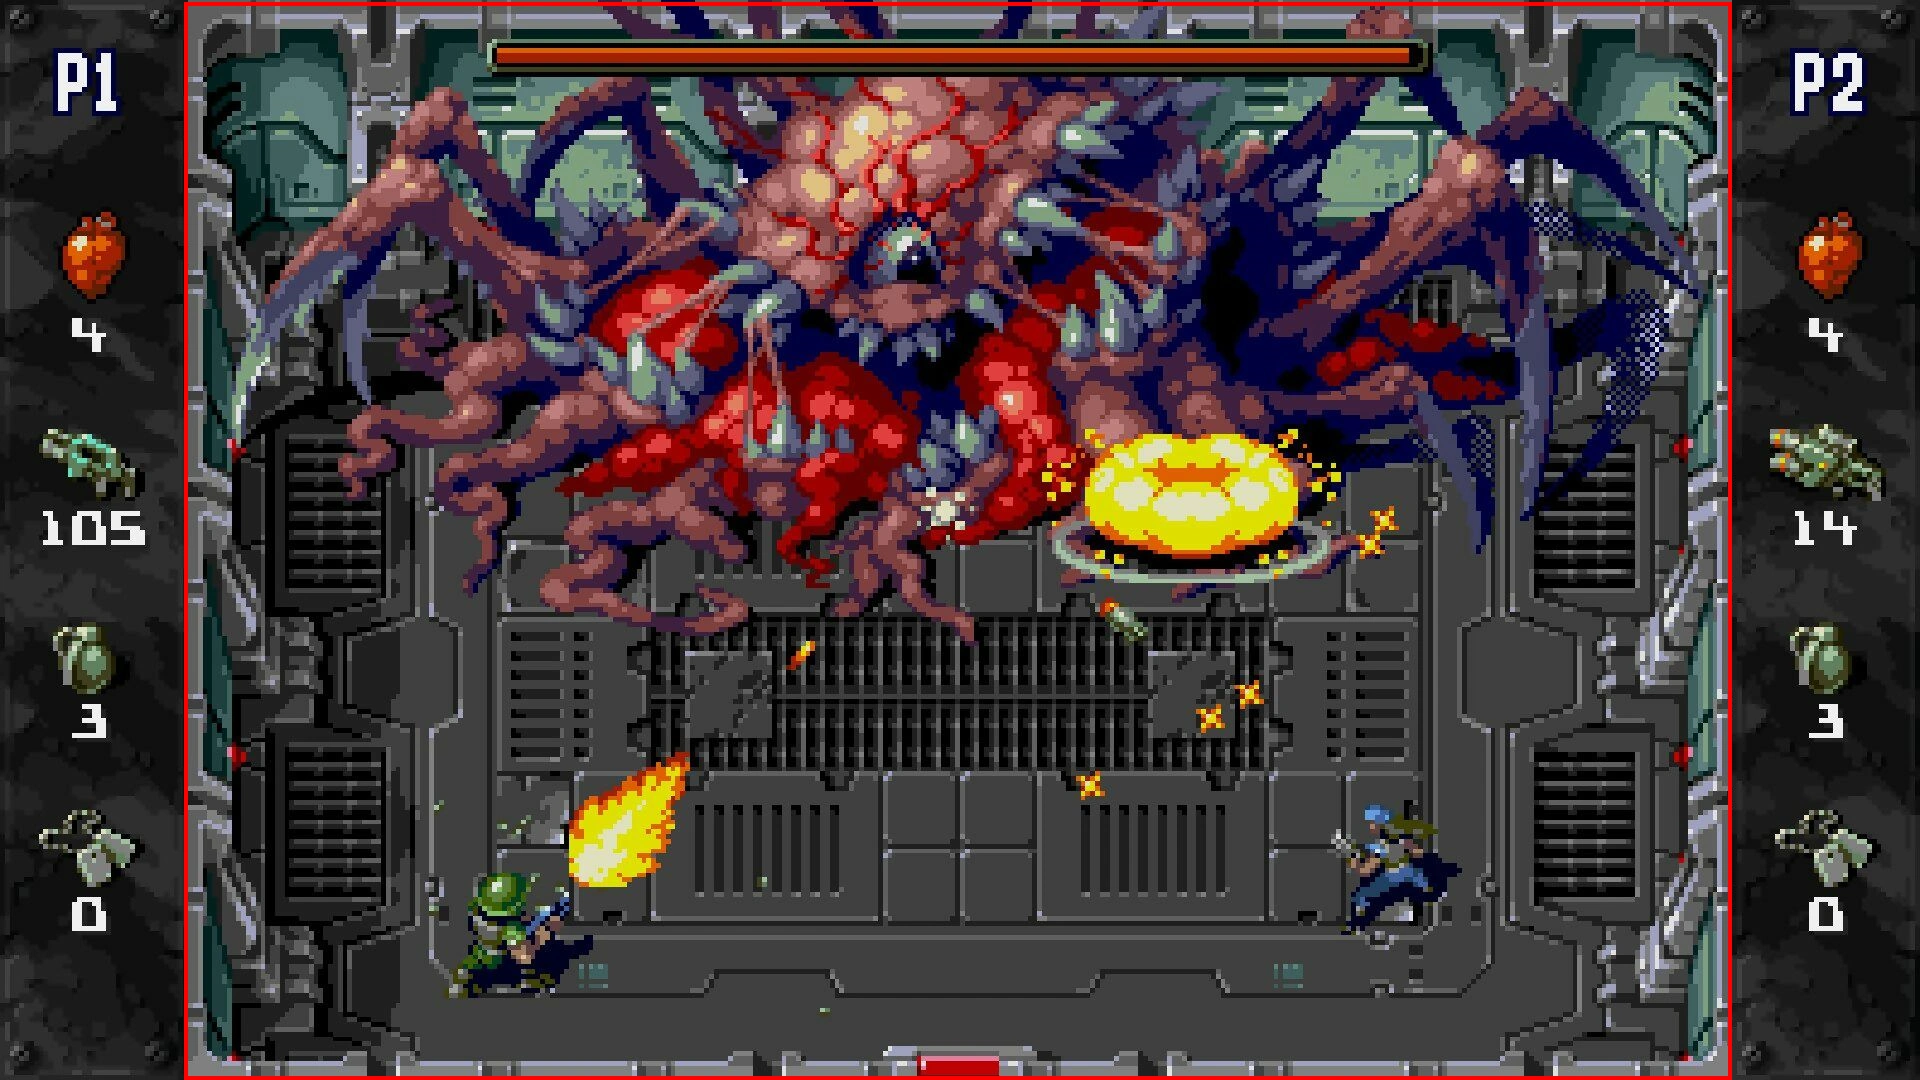
The modern PC and console ports of the game appear to keep the original artwork mostly in-tact and add a simple HUD to the border of the screen in order to pad out the widescreen area. The area in the red rectangle in the image above is what you would see if you played the original game on a Sega Megadrive, which would output a 4:3 image. The area outside the rectangle is just added to pad the image out to 16:9.
In this example we’re using an Xbox Series S, though the same principles should apply for other modern consoles too. Start by setting the console to 720p output mode, which gets us a nicely integer scaled image. Any game doing a 3 x vertical integer scale to 720p from base assets of 240p should work well. Many indie titles use a 240p widescreen base resolution, which would work out at around 427 (ish) by 240. Remember, CRTs didn’t have perfectly square pixels, typically the horizontal axis will have some interpolation to make this work properly.
Let’s start with the easy one first, if you have a 31khz capable widescreen CRT, then you need to do basically nothing. Choose a suitable output resolution on the OSSC, 540p tends to work well on many HD CRTs. If your widescreen CRT processes 720p signals well, then you only need buy a HDMI to VGA converter, you don’t even need an OSSC Pro or any other scaler, other than perhaps to add some scanlines in post processing. If you’re lucky enough to be in possession of such a display, we will assume you tried connecting your console directly to your beastly VGA widescreen before you went and bought an OSSC Pro.
For a 4:3 aspect ratio VGA monitor, you should choose 480p output resolution. You could now simply letterbox the image by going to Scaler Opt.->Aspect Ratio and choosing 16:9, or by simply pressing the AR button on the remote. However, since the widescreen area in this particular game isn’t really used for anything, you can simply stretch the image out until the widescreen parts are off the screen and only the 4:3 game window remains.
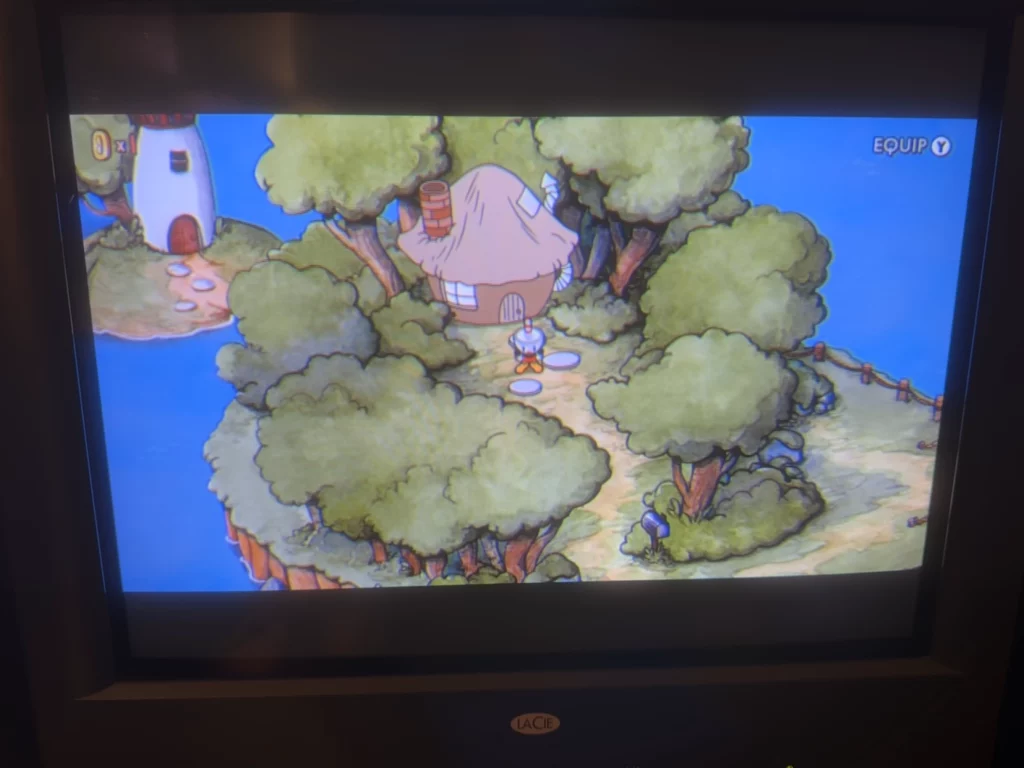
Let’s go through an example of how this works. Note that we’re using DFP mode here because that works with my capture card, but the rest of the principles work the same. To start with, here’s the console on the dashboard, downscaled from 720p to 480p with letterboxing to make the 16:9 image fit properly on the 4:3 display.

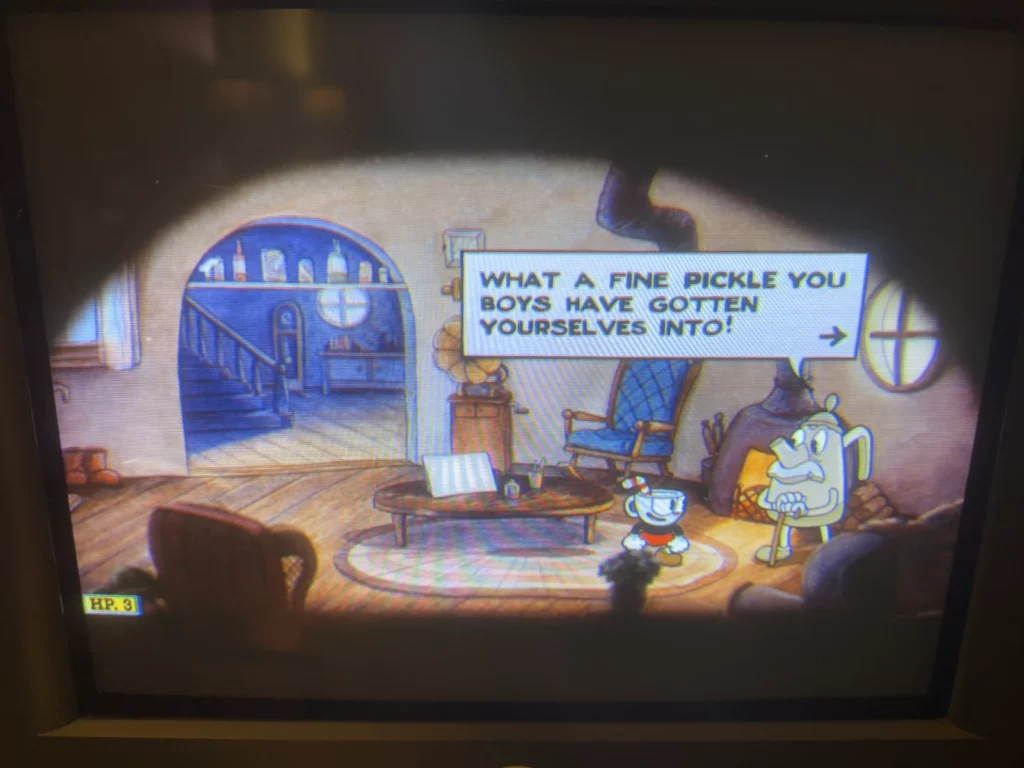
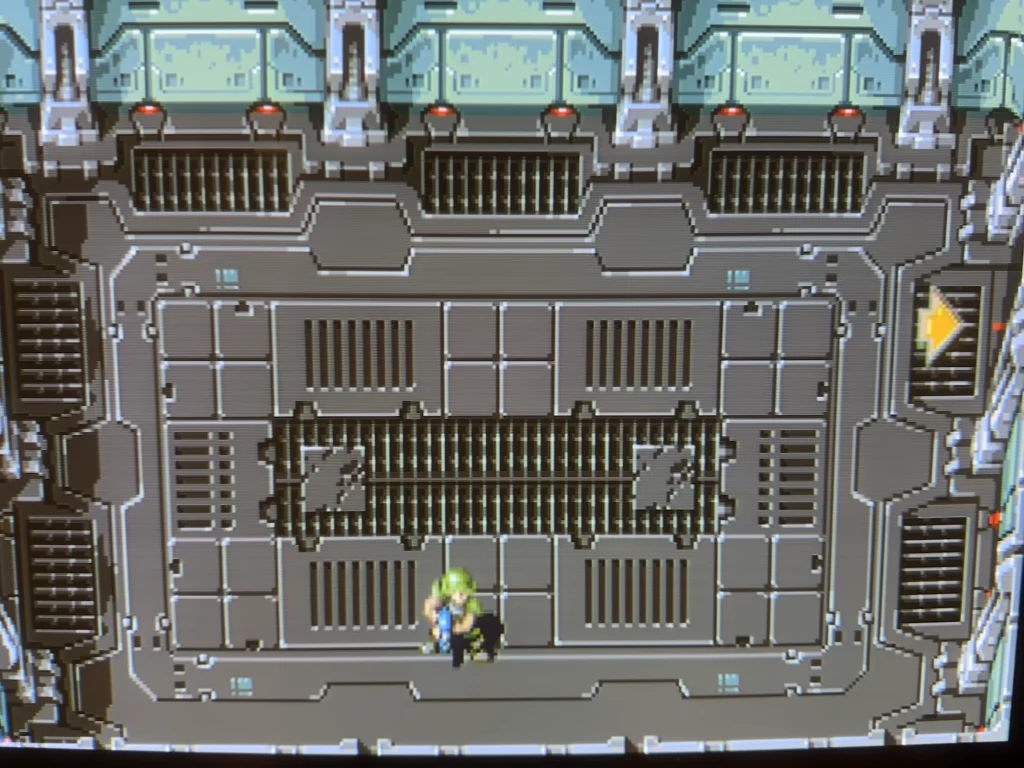
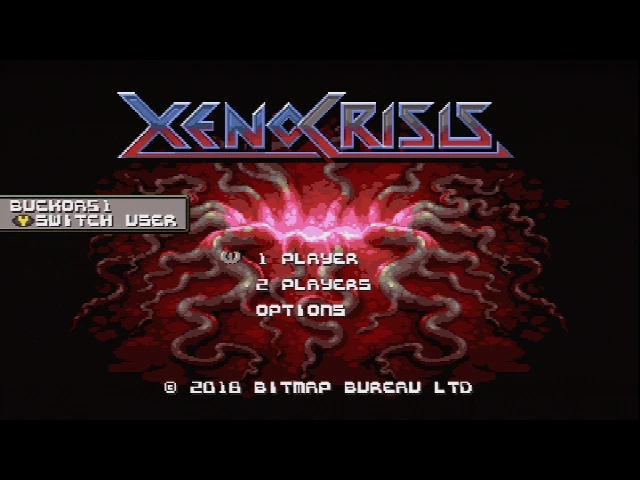
Now, let’s start Xeno Crisis, which will look initially like this:-
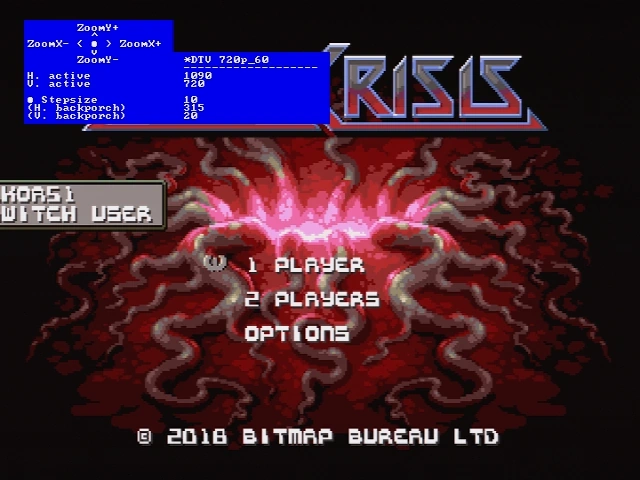
Now, let’s force the image to fill the whole screen, this will stretch it out of proportion, of course, but we will correct that in a moment. Press the “AR” button on the OSSC Pro remote, and choose “Full”.
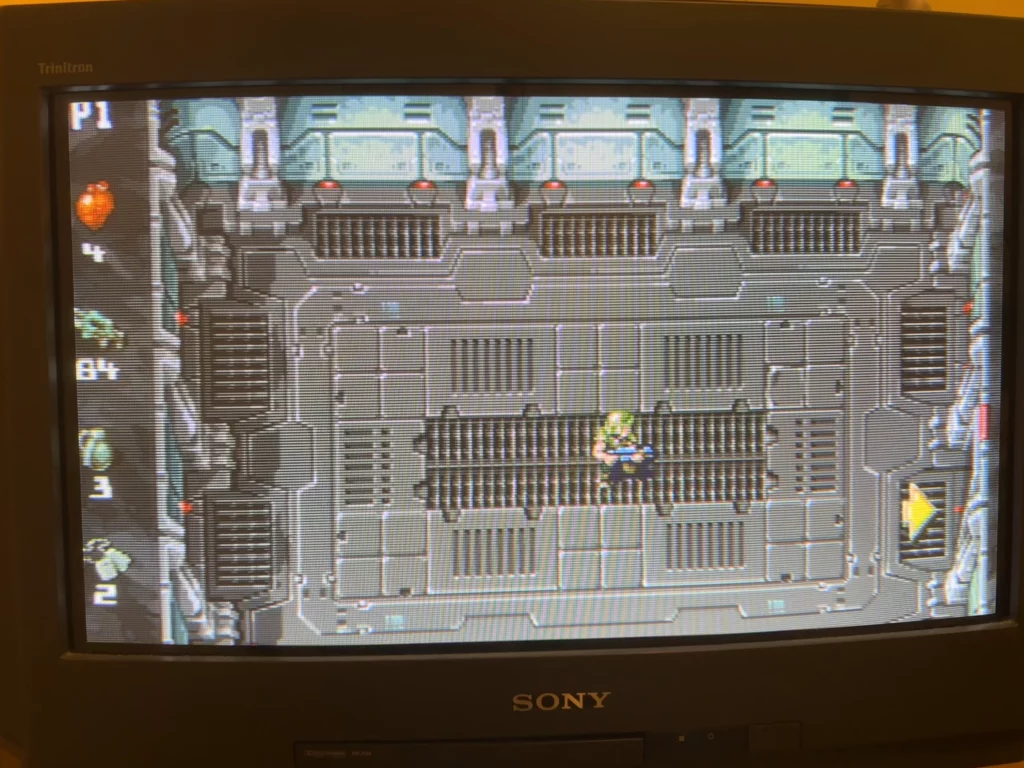
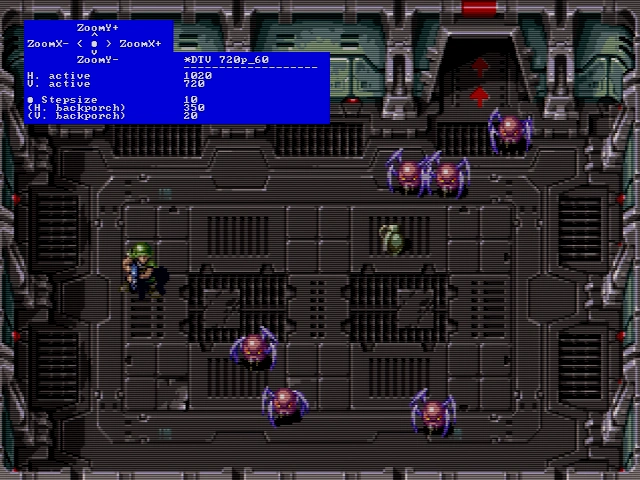
Now, navigate back to the “Scaler Opt” menu and choose “Adv. Timing”. This will open up a sub-menu with three options, choose “Size”. Use the ZoomX+ control to decrease the H. active value to around 1020 to 1090. Remember you can use the OK button to change the stepsize to move the value faster. This will zoom out the pillarbox area leaving you with just the inner 4:3 area visible on your 4:3 display, which works perfectly for this game. Obviously, not every pixel art themed game is going to use the widescreen area just for padding, so you may need to letterbox certain games to make them playable.
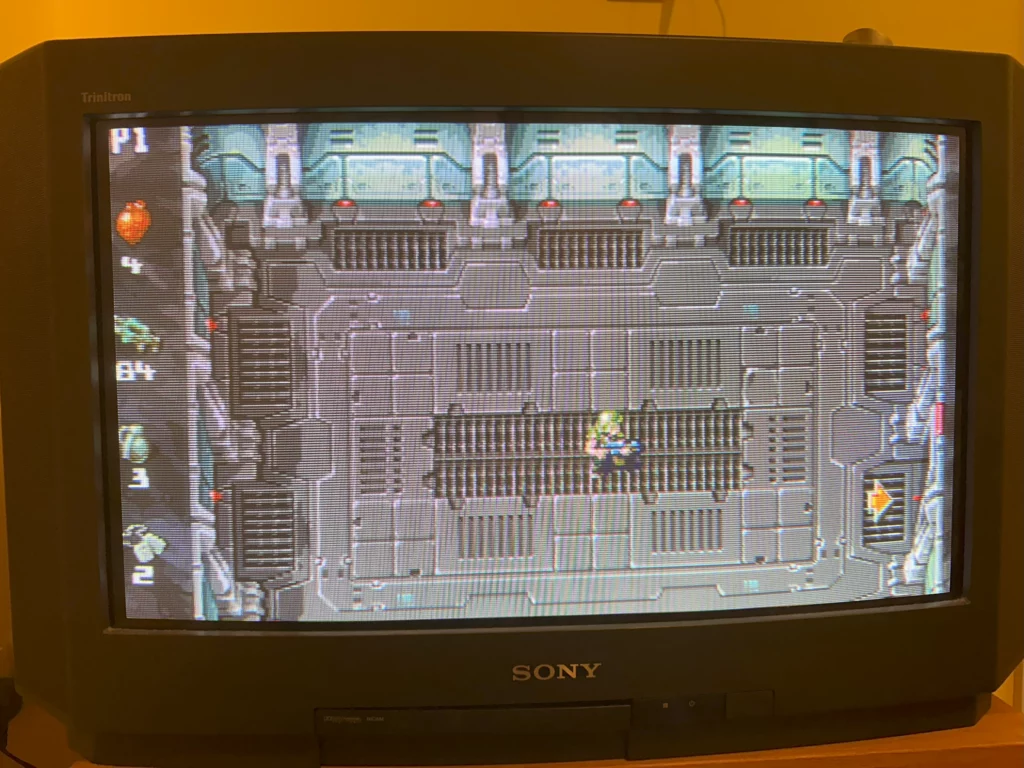
Once you’re done with the zoom adjustments, you may want to go into the scanline options and add some 15khz style scanlines for that authentic retro effect. Alternatively you might be happy with the thinner, VGA scanlines your CRT monitor already displays, so the choice is yours. If you find that the in-game text doesn’t line up properly with your scanlines, use the “Position” control under “Adv. Timing” to move the image up or down slightly. Here’s the final image with scanlines applied:-
How about downscaling to a real 15khz CRT? The principles are basically the same, only you would be using 240p output mode on the OSSC Pro, instead of 480p. Here it’s critical to use the vertical position control to align the image so the text looks as clear as possible. You basically need to dial in the “phase” of the downscaler using this control, so that it is throwing out the correct parts of the image, the parts that were added when the modern console version was created and upscaled from those original 240p assets.
If you’re using a widescreen CRT you do not need to zoom the image on the horizontal, but remember that classic CRTs tend to overscan quite a bit. You can use the picture positioning controls on the horizontal axis to compensate for any overscanning and get as much useful information on the screen as possible.
Limitations
We chose a pretty easy example for this article just to whet your appetite, but it should come as no surprise that not every game will downscale as nicely as this one does. If you want to give this a go yourself, here are some issues you may encounter.
Badly scaled assets – Not every game you encounter will scale as nicely as Xeno Crisis here. Many emulated and pixel art games use uneven scaling, as long as it looks acceptable on a 1080p display, a lot of folks simply don’t care and so neither do the developers. Remember, when downscaling to 240p particularly, you should use the vertical positioning controls to align the image for the best possible results. Use a pause menu in your game and shift the image until the text is as clear as possible.
Indie retro titles that ‘cheat’ with their base assets – There are lots of titles that use upscaled 240p assets most of the time, but not always. If you throw away this extra resolution in order to downscale the image for a classic CRT, you may find that the games are not fully playable. Two examples of this are Axiom Verge, which hides certain hidden level indicators in areas of the image that are lost when downscaling and Toby Fox’s Undertale, which uses a smaller font for some encounters when the characters speak in a quieter voice. This smaller text can be unreadable when downscaling the game.
Jitter – Many 15khz consumer CRT TVs are highly prone to jitter in the image. This is not so easy to notice when viewing at a normal distance, but can become quite distracting when playing a video game. Image jitter is something you may have simply ignored back in the day, but you are much less likely to excuse it now that everyone’s used to a perfectly stable image on even the cheapest HDTVs.
Overscan – Again, classic 15khz TVs in particular are prone to overscan. You may find parts of the image cropped or missing from the display. Back when CRT displays were in every house, overscan was so common that it was standard practise to simply avoid using the outer areas of the image for anything important. As modern TVs are not affected by this problem, you will find modern indie pixel art titles in particular don’t avoid using the overscan areas at all.