Best Games Rooms, Games Rooms
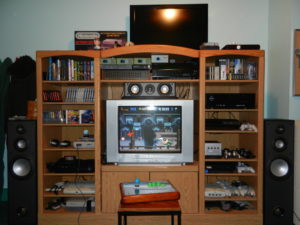
rCadeGaming’s amazing games room
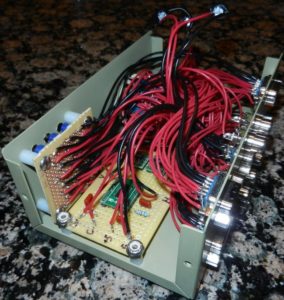
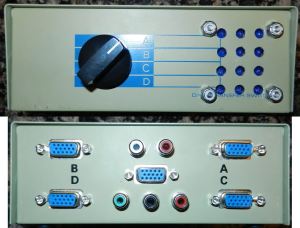
Rob originally documented his gaming setup on the Shmups forum here. Probably the most impressive element of this setup is that every single console outputs RGB video over custom cables. We’ve seen time and time again on VideogamePerfection.com how SCART switches vary so much in quality. One solution to this problem is to simply build your own switching solution. The switches in this particular setup are modified VGA switches. Even more impressively, each switch includes in-built sync processing and individual adjustments for Red, Green and Blue levels. Take a look at the picture below that shows one of the switches in close-up. The front of the switch is shown at the top, and the back at the bottom (click the picture for a bigger view).
Each custom switch can carry audio as well as composite and S-video signals where necessary. Rob’s setup also includes a Extron Super Emotia. This is a device we’ve not covered in depth here on VideogamePerfection.com, largely due to us not having a CRT display on the premises any more (a situation I’d like to remedy one day, space permitting!). The Super Emotia downconverts VGA signals into 480 interlace or, more importantly, 240p. What this means is that you can take an Xbox 360 for instance, running an oldschool shmup or fighting game and convert the 360’s VGA output back into true 320×240 resolution, restoring proper scanlines on a CRT display. You can find a little more about the device here.
We were lucky enough to get the chance to ask Rob for some more information about his setup and what motivated him to build it.
Can you tell us a little about what motivated you to build such an incredible setup?
Honestly, I was just tired of switching wires around to change between consoles. A few years ago I started learning about video. Prior to this I had been playing all my consoles through composite video on an old Zenith CRT TV from the late 90’s. Keep in mind, old consoles do still output ~240p over composite, but between the blurriness caused by the composite signal and the coarse dot pitch of this old TV you couldn’t even see any scanlines. It was all I had and I didn’t know any better.
Eventually, I learned about what I was missing and how to fix it. I think this all coincided with getting into arcade games, building custom fight sticks, and having to learn about electronics and how to solder. Anyhow, I learned how to get RGB video out of my game consoles and upgraded to a nice 15kHz Sony Trinitron CRT TV (a quality “standard definition” tube TV). Back in the composite days, I had everything switchable using a composite-AV switch box and my surround sound receiver. I had gotten used to that, but now that I had upgraded to RGB I had nice video but no way to switch between consoles without moving wires around. It was a real pain.

At that point I was still using SCART connections. I was just connecting a SCART cable between the console and a component transcoder, which would send component video to the TV and audio to the surround sound. Looking at commercially available switching solutions for that kind of setup, I didn’t see anything appealing. RGB SCART switch boxes are way overpriced, especially for the amount of sources I had in mind, and I have heard a lot people say that they have issues with them. I realized that the SCART cables from the console and the VGA cable from the computer were both carrying the same thing, RGB video. They use different connectors, and VGA uses separate horizontal and vertical sync (RGBHV) whereas SCART uses composite sync (RGBS), but maybe I could fix that.
I had already used solder-able D-sub connectors in my fight sticks, so I knew they’d be cheap and easy to work with. While looking at the VGA pinout, I realized there were lots of unused pins. It’s a 15 pin connector, and there are only 6 necessary connections; red video, green video, blue video, horizontal sync, vertical sync, and ground. I realized I could modify the pinout to carry a lot more than just RGB video. I could use it to carry the audio, removing the need for separate audio and video switching. I could add a 5 volts line that would automatically activate the sync splitter when composite sync was used. I could even carry other types of video in case RGB isn’t available (like from an NES). This all works great as long as everything gets split back apart before the final output from the last switch box in the chain. The transcoder still only gets a VGA signal on the standard pinout, and the audio and other forms of video are sent elsewhere.
So, that is how it came about. I wouldn’t really call it “incredible” by any stretch of the imagination. I think I can at least say it was clever to use a modified pinout to carry more signals, put the sync splitter inside a switchbox, and add tweaker pots to adjust colour levels, but it’s really only one step above connecting the dots.
What was your main reason for incorporating the CRT and Extron Emotia, rather than an upscaler like the XRGB Mini?

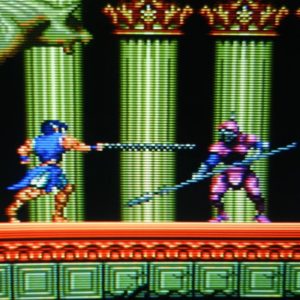
Right now, it is still not possible for a modern flat panel display (LCD/LED/Plasma/etc.) to match the picture quality of a CRT in terms of displaying ~240p content, meaning just about anything prior to the Dreamcast. Upscalers and scanline generators offer a big improvement in quality, but the natural smoothing and real scanlines of a nice CRT still can’t be beat. On a good CRT, pixels and scanlines are distinct, but not too sharp, it’s just right. Once you’ve been working with this stuff for a little while, the difference is glaringly obvious.
There is also the problem of input lag. Even with the best upscaler and low-lag flat panel display, there is still going to be some amount of input lag, however small. A CRT displays video relatively instantaneously upon receiving the signal, so there is always a slight improvement in gameplay with a CRT.
What initially prompted you to build your own RGB switches? Have you had problems with commercial SCART switches for instance?
I guess I answered this one in my response to the first question. I haven’t actually used a commercial SCART switch, but the prices are unreasonable and I heard a few bad things, so I don’t feel it was worth looking into, given the alternatives.
You custom make your cables too, how time consuming is this?
If I have the parts on hand, I can make a RGBS+audio cable for a Super Nintendo in about ten minutes. Most consoles are like this, but there are a few special cases. A Dreamcast RGB cable is a little more work if you want to be able to switch between the different modes. A Gamecube RGB cable is very time consuming (and expensive).
Personally, I’m not really concerned with how time consuming all of this is. I have kind of a sick mind. Working on this stuff is FUN to me.
Given unlimited time, money or space, is there anything you’d add or change around?
Yes, absolutely. This whole setup was kind of a prototype for the video switching in an arcade cabinet I’m planning. When the cabinet is powered on, the PC will turn on and it will load a front-end I’m working on. From there you can select either a game in MAME, the current arcade PCB, or any of the game consoles connected. The front-end will tell a micro-controller to switch the audio/video and controller connections over to the appropriate source. When you’re done playing, you can press a menu button on the control panel, and the front-end will come back onto the screen. So, the cabinet will have to do the same kind of switching that my current setup does, in addition to switching controller connections. This is another reason I started thinking about my own solution to that kind of switching.
You obviously see the value in preserving and running original hardware. Do you feel that emulation has any place in a high-end gaming setup?
Well, yes and no. For a completely optimal experience, real hardware is a must. Realistically, this isn’t always possible though. You have to make compromises depending on how much money, space and time you have.


