Artemio
@artemio
Forum Replies Created
-
AuthorPosts
-
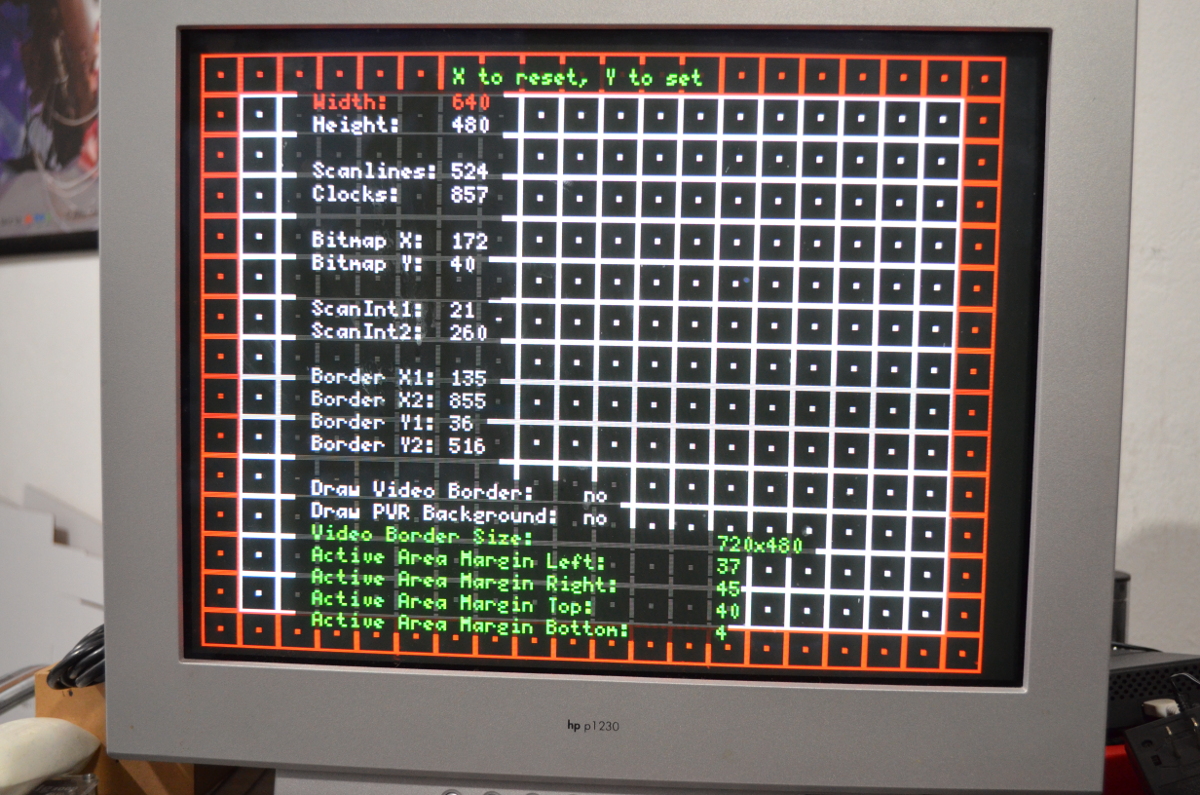
There are effects, but most would be unusable. It might not be the case, but I know my menu is not very clear (I only used it for internal testing), but you need to press Y to set the values.
I had to dig into my logs from 2012 to be able to answer your question.
Back then, I was implementing the VGA mode, and found out that the default video mode given by KOS on Dreamcast didn’t fill the full video frame. Let me explain. Just as you mention, it is 640/856 and the dreamcast can only have graphics inside those 640. However, it can fill the entire active line with a solid color. I did implement this in the suite, but as a hidden feature for my testing (Under options, select “Back to Main Menu” and press Y+A simultaneously to toggle it).
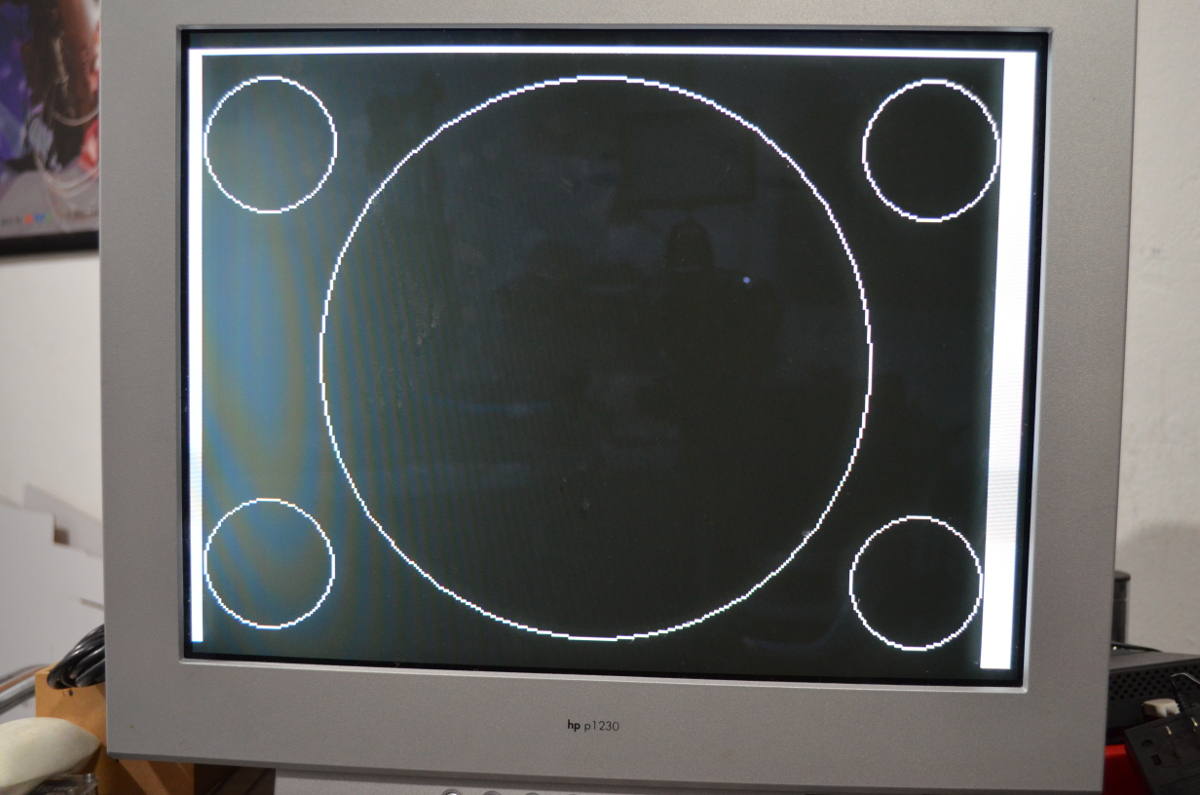
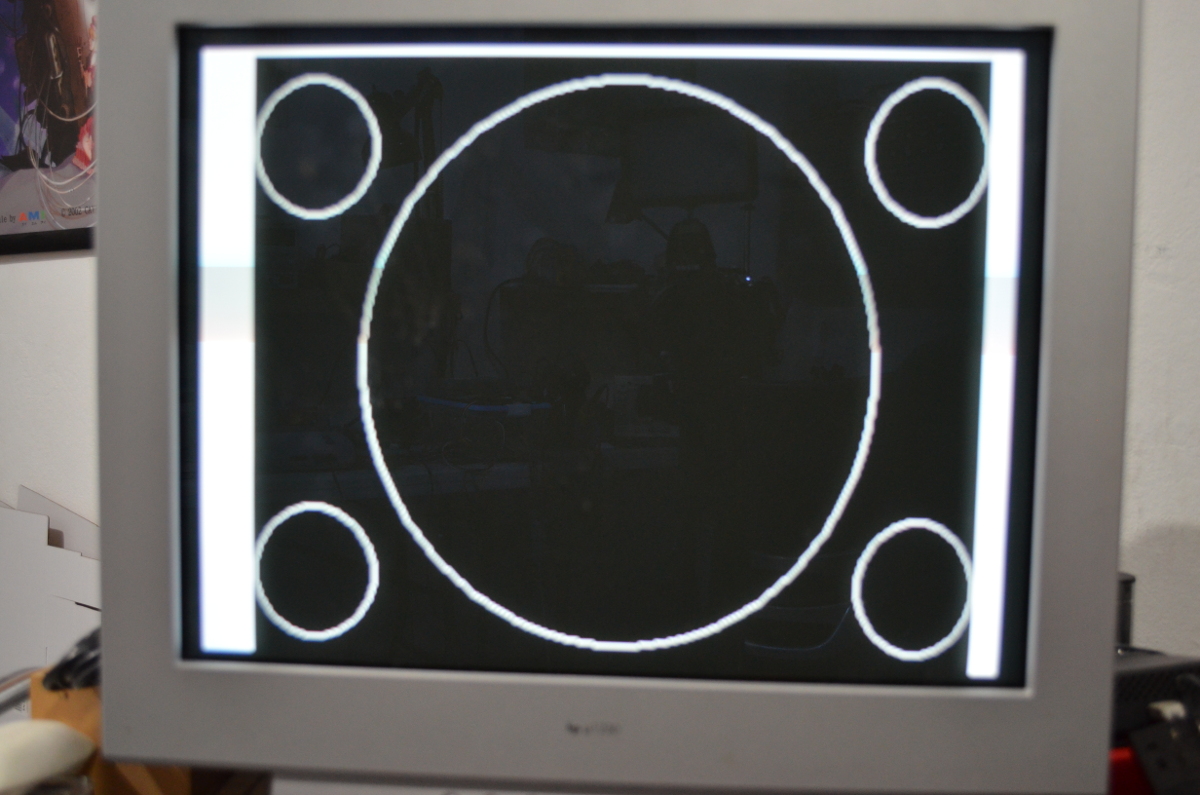
Normal Video Signal: http://junkerhq.net/cps2/Menu-Normal.JPG
Full active line in white: http://junkerhq.net/cps2/Menu-Active.JPGUnder closer inspection, my monitor does have an auto adjust feature, and I can force from the menu. When the full active video area is filled with a solid color, the aspect ratio when using the auto adjust the PAR is 1:1 in 640×480. That’s why I decided to implement the 1:1 PAR linearity test for VGA when in that mode. However, if you set the whole active video area to white, you have 720×480 and the NTSC PAR.
Regular 1:1 PAR in VGA: http://junkerhq.net/cps2/Linear1_1.JPG
NTSC PAR in VGA caused by full active line in white: http://junkerhq.net/cps2/Lineas_NTSCinVGA.JPGThis takes me to why I changed the values. The default values didn’t fill a 720×480 area when I was checking the 240p and 480i values with my scope. So I implemented a screen to test, where I could tweak the internal values for the video signal and figure out the best ones.
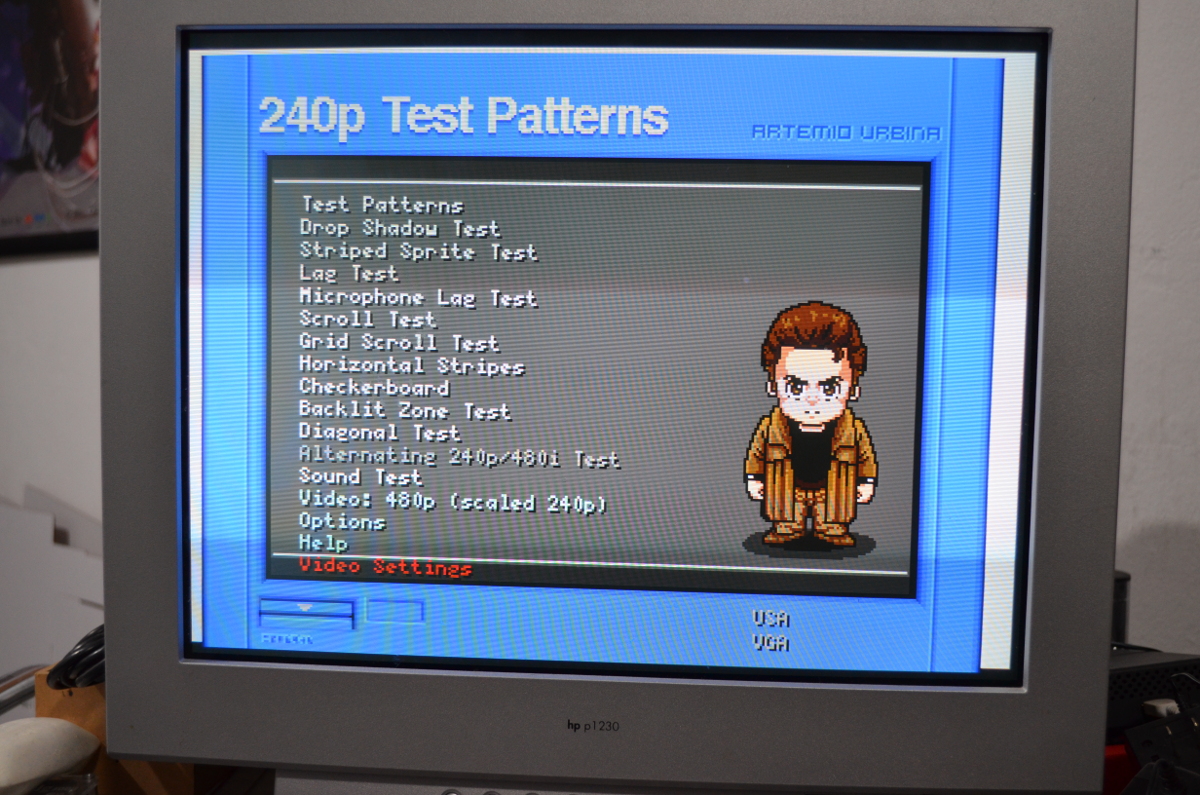
Main menu: http://junkerhq.net/cps2/Menu-DebugVideo.JPG
Video Test Menu: http://junkerhq.net/cps2/VideoTest.JPGThere I noticed some values weren’t allowed, and the values I ended up with that did fill the area, didn’t crash the dreamcast and showed on the monitor were those. In other words, I messed up the timings to fit the values and didn’t notice.
I rescued that test today, and rechecked with my values combined with the proper timings, and they work. They’ll be the defaults for the suite now.
TL;DR I used those values because I made a mistake when fixing some other stuff, and they worked for me. I’m sorry for the troubled caused.
Here is a version of the suite compiled with the proper defaults for timings, and that has the Video Test debug menu enabled: http://junkerhq.net/cps2/240p-DC-PVR-1.23b-videotest.zip
Just as a note, the monitor is an early 2000 one, and the image shown is in defaults as the monitor syncs to it. I didn’t manually adjust it but it is indeed in 640×480.
Regarding what PAR developers used, the probably sticked with NTSC. Or at least only with one. Having all the resources or data calculated for both would be too much work, but possible. Stretching in frame buffer would not be likely in the Dreamcast though.
Hey guys,
The values the suite uses for VGA output are H=855 and V=526, pretty close to what marqs mentions.
Regarding PAR, it uses 10:11 for NTSC and 59:54 for PAL. However, when in 480p you can output either 1:1 or 10:11 depending on what you have selected. I guess I never updated the Dreamcast help t reflect that, sorry.
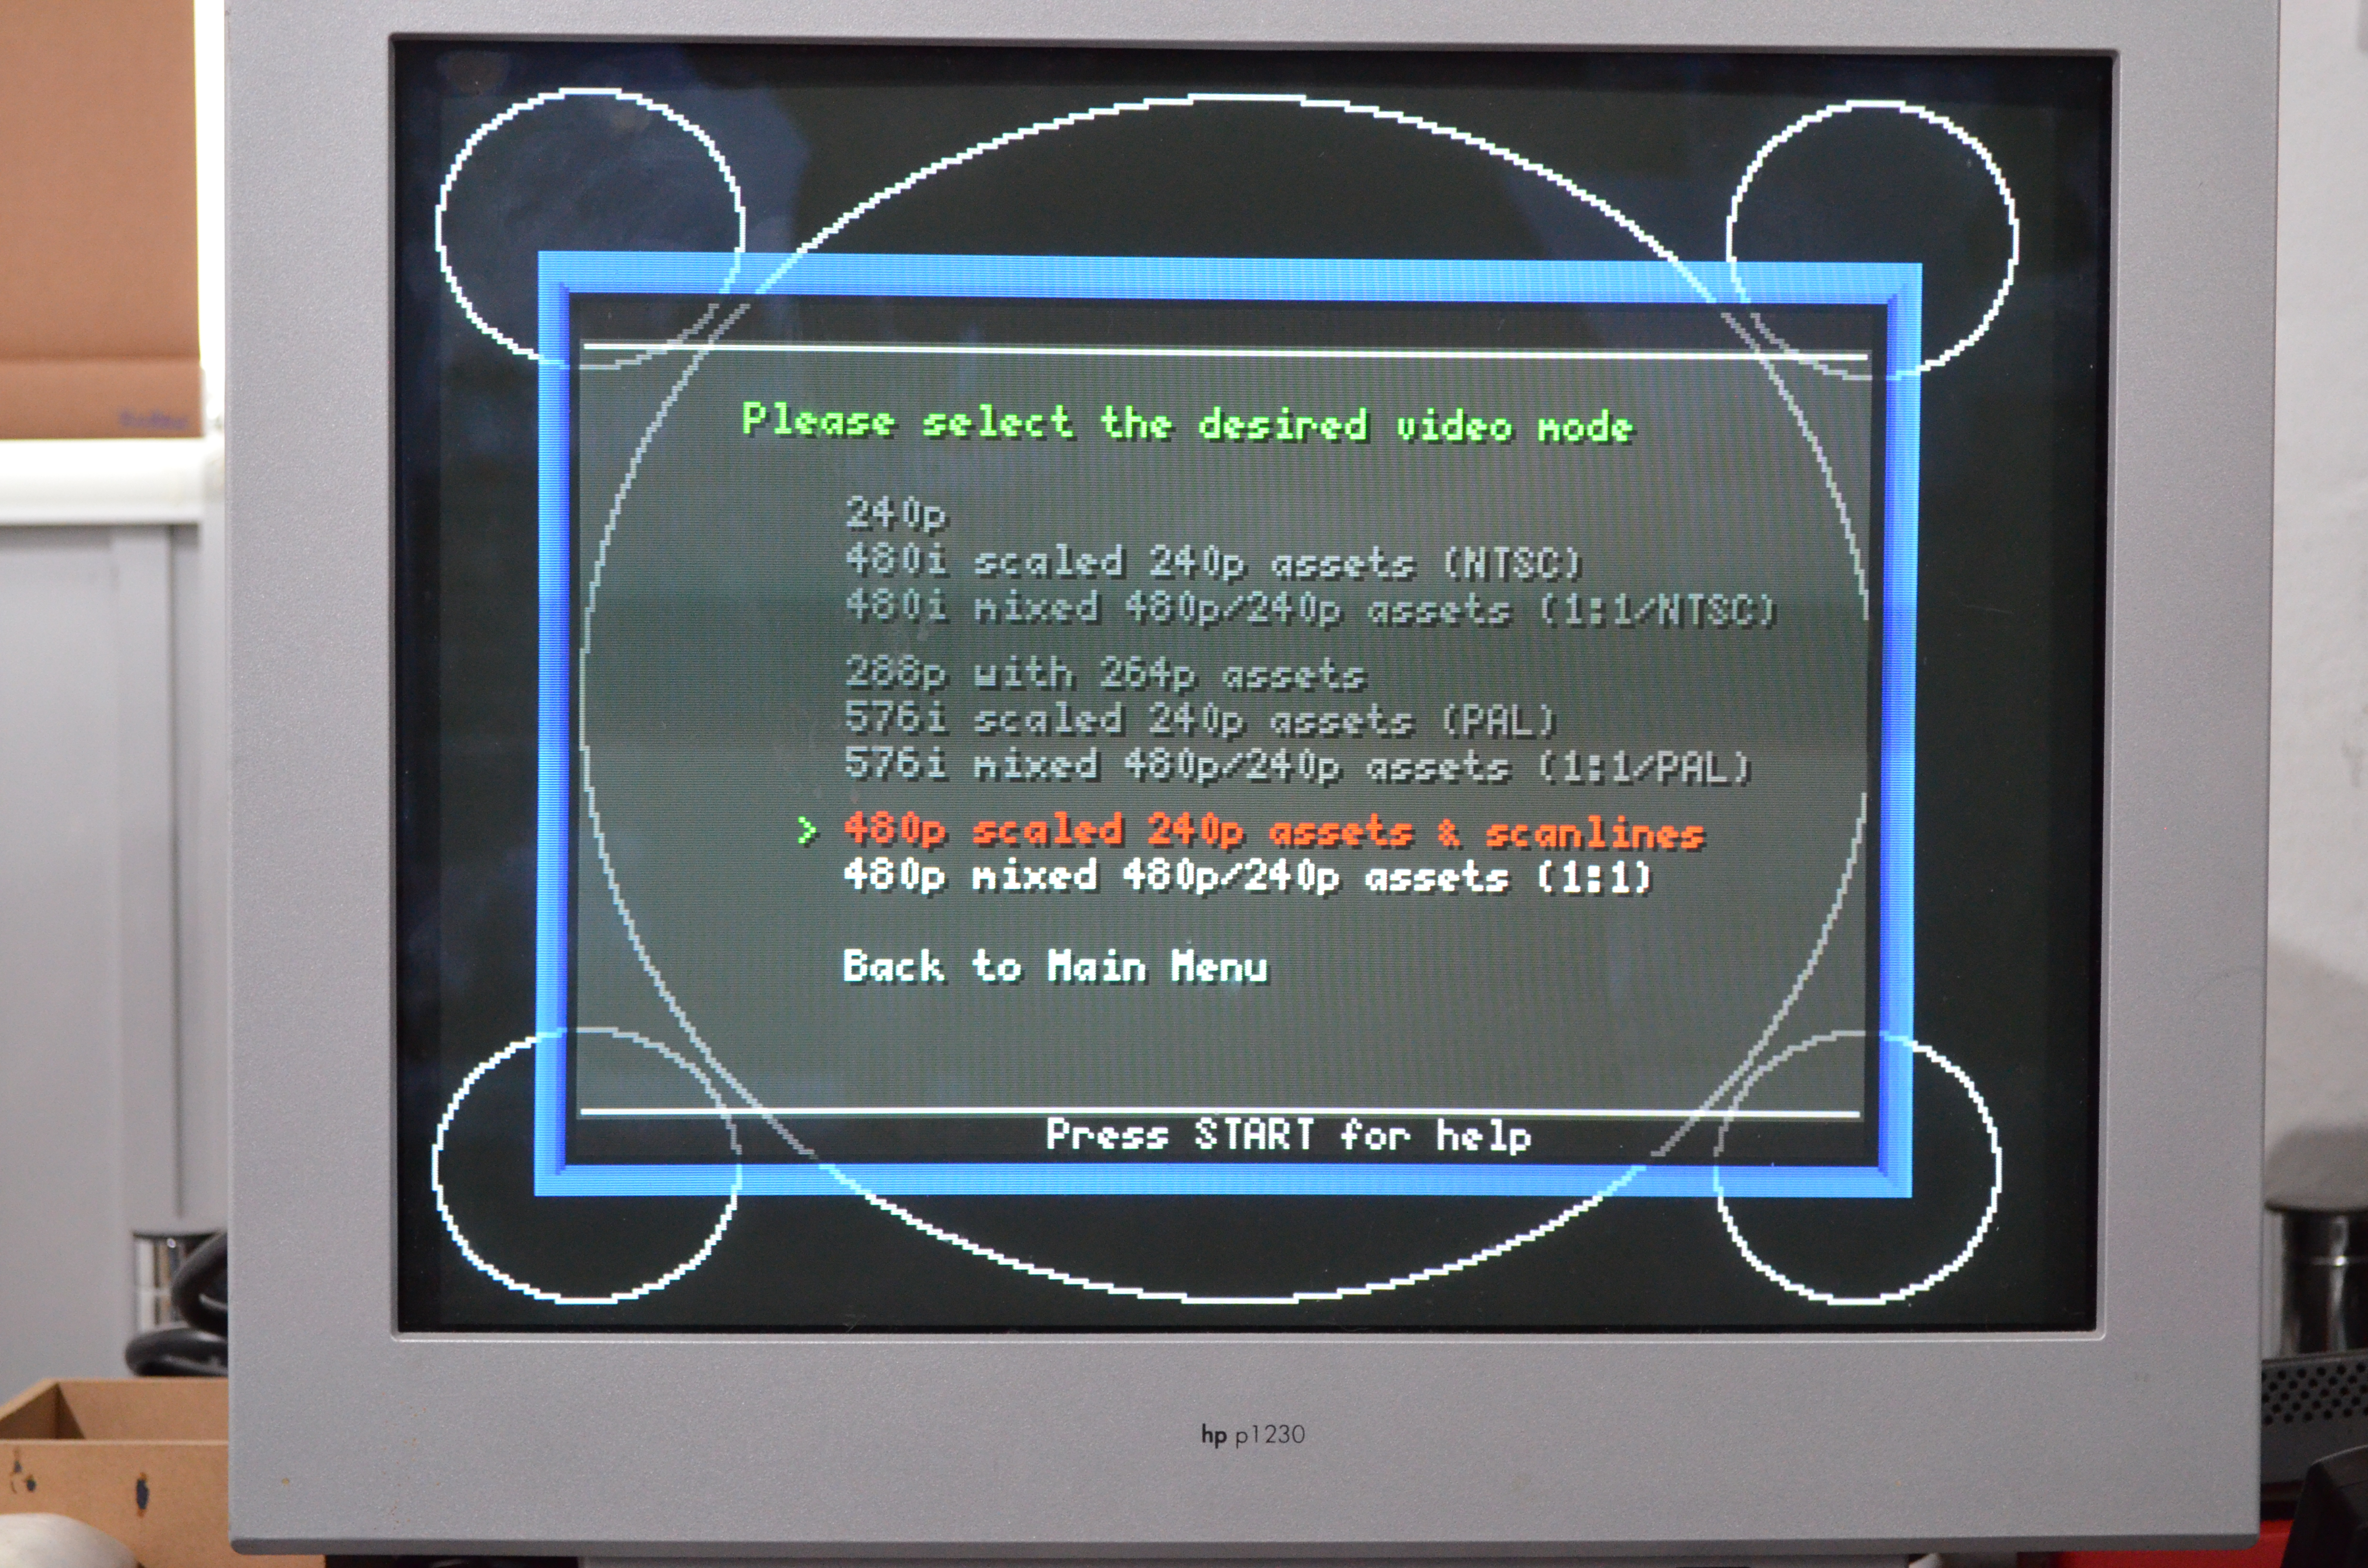
If you select the option that reads: “480p scaled 240p assets & scanlines”/”480p (scaled 240p)”
You get: http://junkerhq.net/cps2/NTSC-PAR.JPG
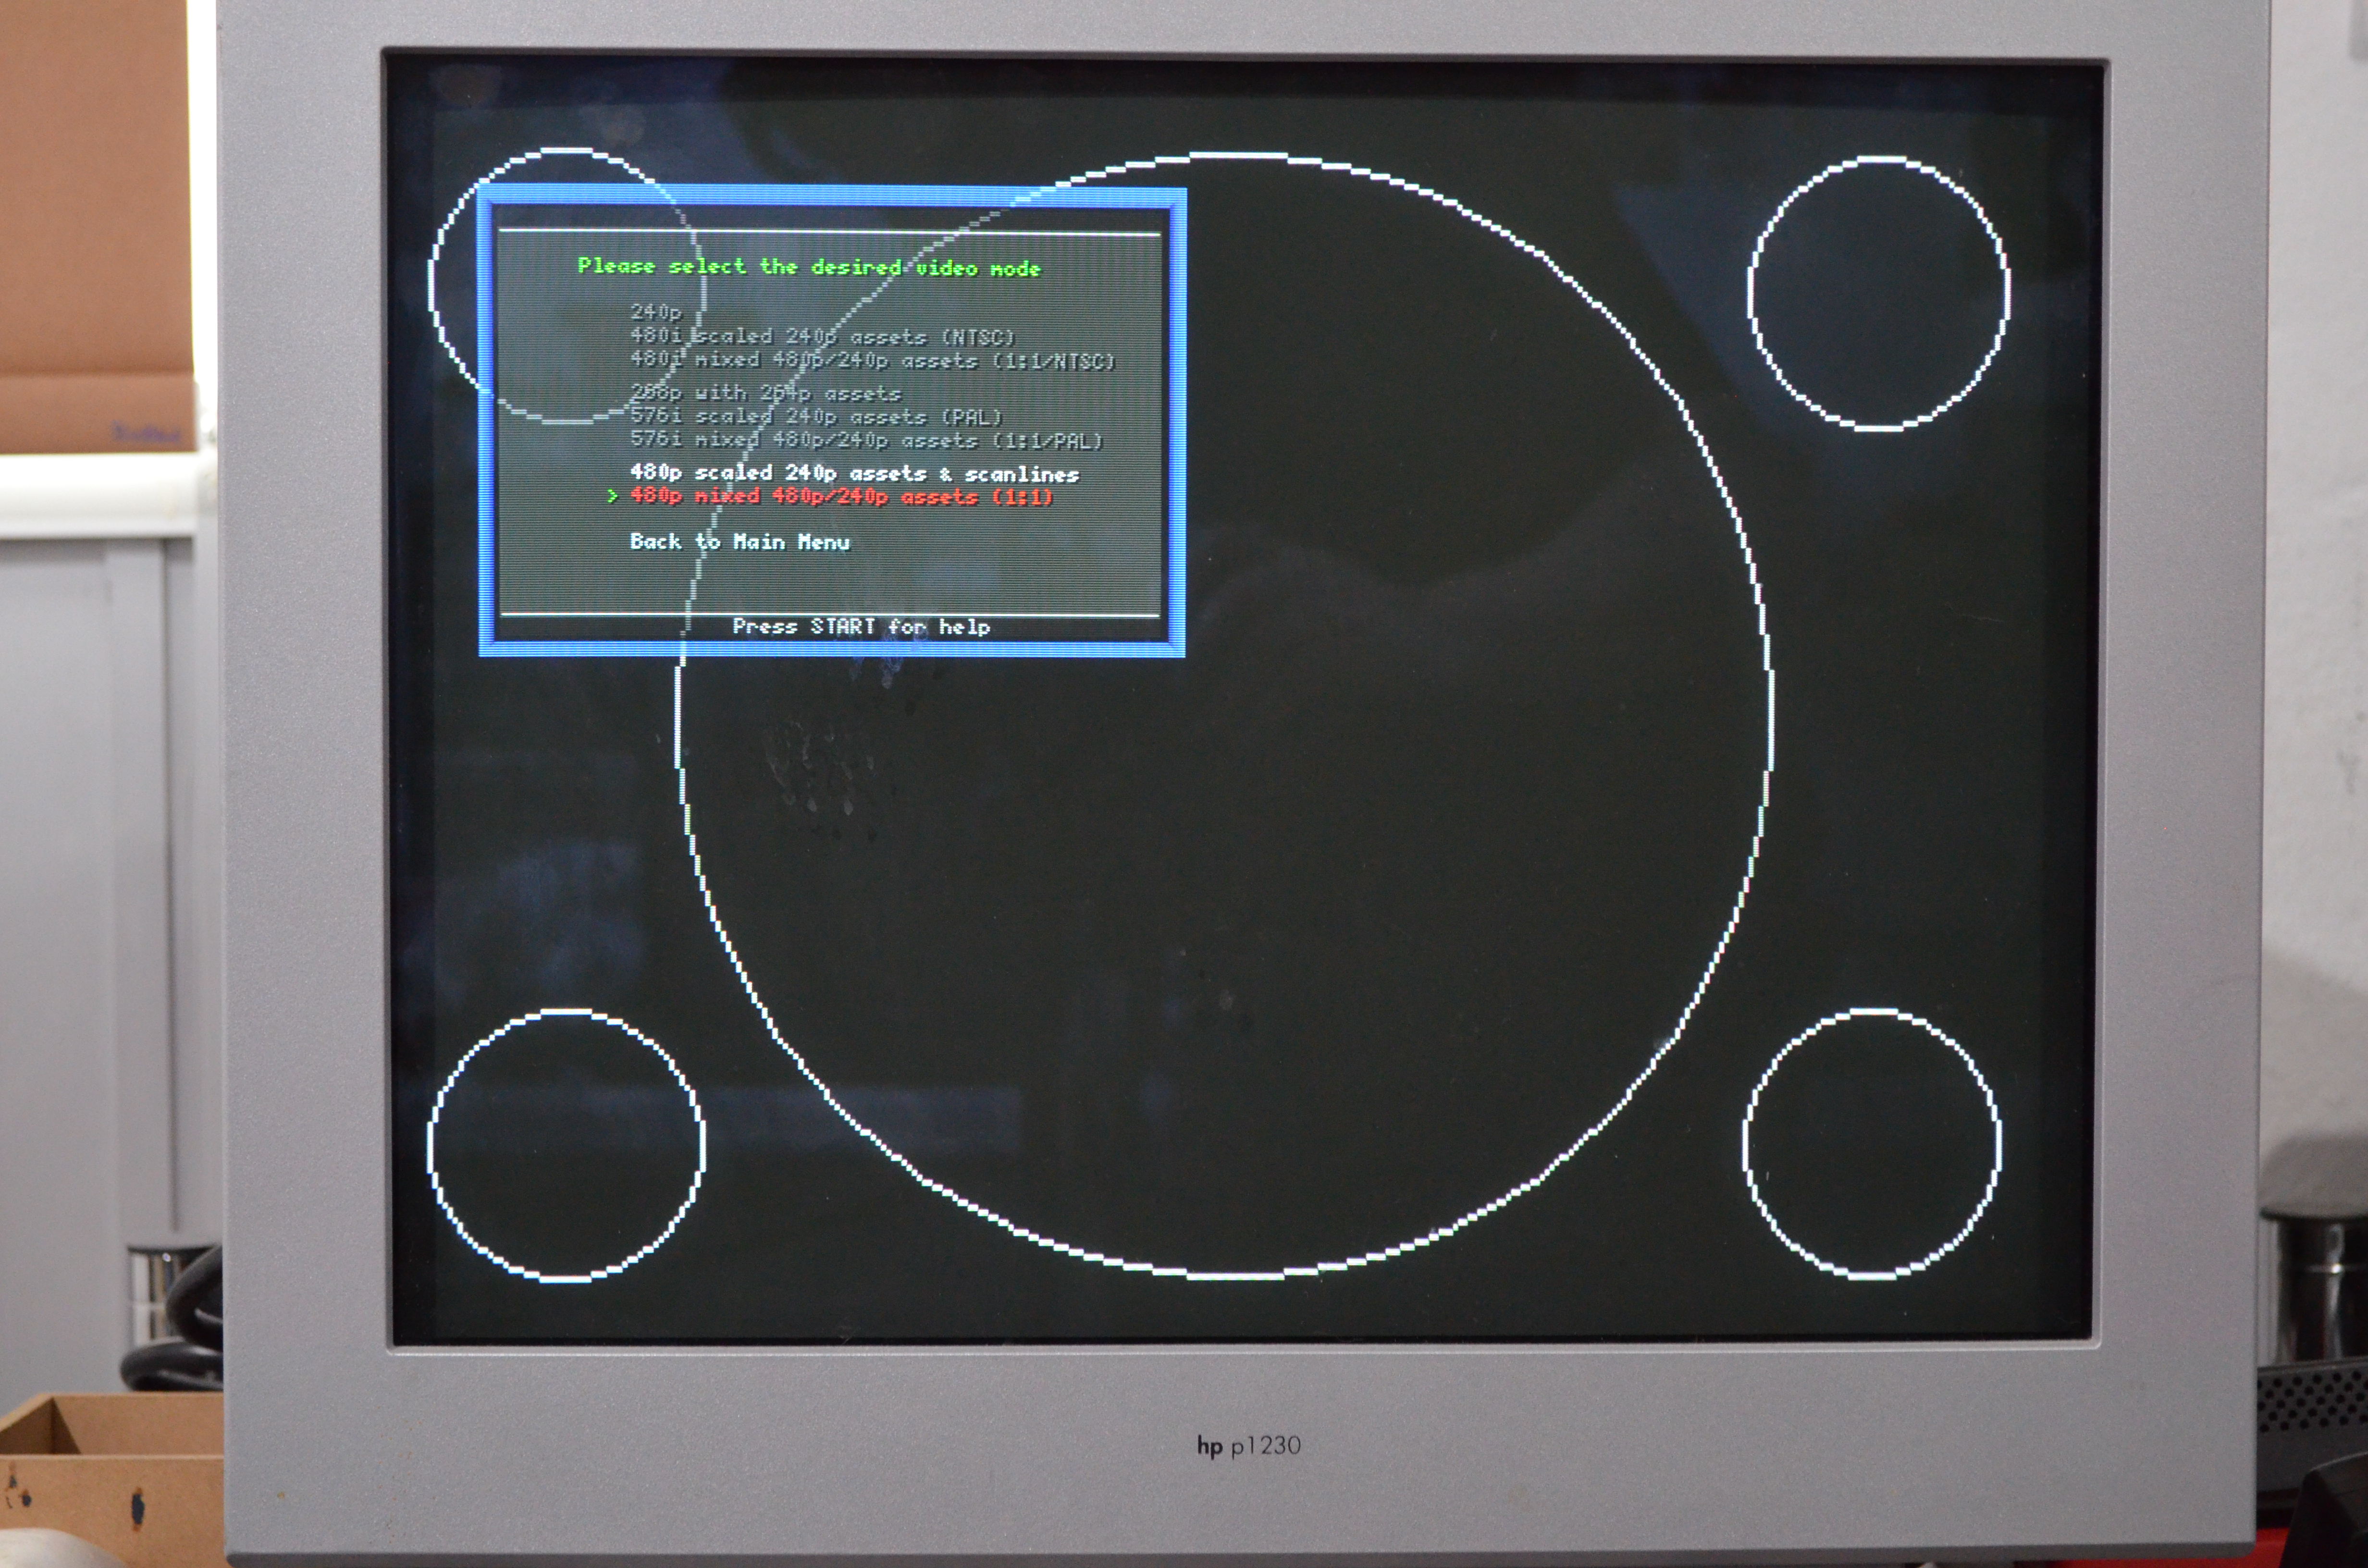
And if you select the option that reads: “480p mixed 480p/240p assets (1:1)”/”480p (Scaling disabled)”
You get: http://junkerhq.net/cps2/VGA-PAR.JPG
I need to update the suite anyway, withe the latest changes from the 16bit versions. So if you have suggestions let me know. I’ll make it so teh helkp reflects this changes, and those menu options are more clear (as the NTSC ones are: “480i scaled 240p assets (NTSC)”/”480i mixed 480p/240p assets (1:1/NTSC)”
-
AuthorPosts