Howto & Guides, PC Guides
ReShade Tutorial
When it comes to gaming, the PC has always been at the bleeding edge of graphics technology and techniques. The ability to tweak and configure your games exactly how you like is also a hugely attractive feature for serious gaming enthusiasts. Thanks to the open nature of the PC, you can tinker with things to a far greater degree than is possible on consoles. Of course, this can come at the cost of simplicity and convenience, but we’d imagine most of our readers wouldn’t mind spending a few more minutes tweaking their setups for best results. If you are the type of gamer that gets a buzz from optimising your PC games, then ReShade is definitely for you.
What is ReShade?
ReShade introduces itself on its homepage as “an advanced, fully generic post-processing injector for games and video software”. Post processing is, as you might imagine, adding effects to the games image after it has been rendered. You may have heard of a similar project called SweetFX, and in fact ReShade includes SweetFX and a number of other tools. You can do all kinds of things to an image in post-processing. For instance, you could add scanlines to give a game that retro feel. You can add additional antialiasing, depth of field effects, tweak colours, blur or deblur and much more. In fact, the amount of options in the ReShade package is quite overwhelming, but don’t worry, as there are pre-configured presets for most popular games.
Getting started
There are a number of tutorials around the web for ReShade, but most of them seem to be lacking key bits of information to get you up and running quickly. With that in mind I’ve compiled this simple tutorial to get you going with the minimum of fuss. Obviously, if there’s anything you don’t understand, let me know in the comments. The first thing you need to do is visit the ReShade homepage. Click on the purple “Download” button to get the latest package. Once you have downloaded the package you will need to unzip it. The file is downloaded as a 7-zip file so you will need the 7-zip package to uncompress it. If you’ve never used 7-zip before there are some beginner tutorials here. Unzip the files into any directory on your PC. I placed mine into D:\Tools\ReShade, but you can use any suitable folder.
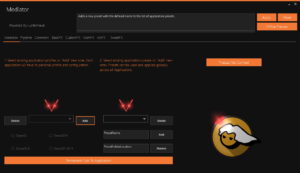
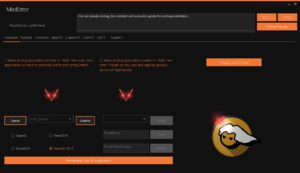
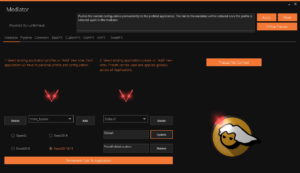
The next step is to check for a preset for one of your games. You can of course create your own effects with ReShade, but if you’re just getting started it is probably better to use a preset so that you can get up and running quickly. To find a preset for a game of your choice, visit this page. Here, you will be able to search for a game or browse the list of presets. You can also see a before and after comparison for most games. Unfortunately the site seems a little clunky and getting a full-screen preview is somewhat awkward. Despite this drawback the site is perfectly usable and you should find yourself a preset fairly quickly. Once you do, click on the “Download Preset” button. You will end up with a text file, we will use this file in a moment. Now, go back into the folder where you unzipped the Reshade file you downloaded before. Inside this folder there should be a program called “Mediator”. Start the Mediator program and the following window should open (click on any picture to enlarge it).
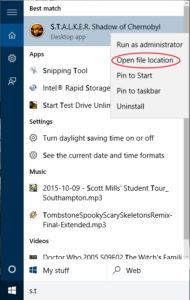
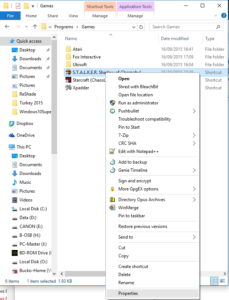
First of all you need to find the name and path of the games executable file, for whichever game you want to work with. Usually you can do that by searching for your game on the Start menu/screen and then right clicking and choosing “Open file location”. In the picture below, we’re doing this on a Windows 10 machine.
Most times in Windows 8 and 10 this will take you to the Start menu folder in File Explorer, as per the screenshot below. You need to right click on the shortcut and choose “Properties”.
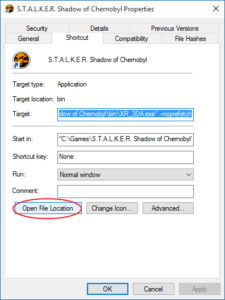
The window shown below should then be displayed.
You can now click “Open File Location”. This should take you to the actual installation folder for your game.
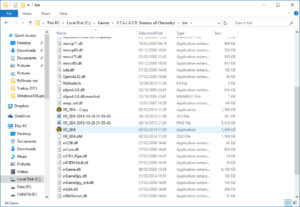
This method doesn’t work for every game. Continuing Windows fine tradition of inconsistency, some games will put their shortcuts into the old Games Explorer, which is still in Windows 10 but doesn’t even seem to appear on the Start menu any more. Steam games launch through a special URL, so won’t work with this method either. Instead, check the following folders for games installed with popular services. Obviously substitute C: for the drive letter where you installed these respective DRM systems, I mean game launchers.
Steam – C:\Program Files (x86)\Steam\SteamApps\common
Uplay – C:\Program Files (x86)\Ubisoft\Ubisoft Game Launcher\Games
Origin/EA – C:\Program Files (x86)\Origin Games
Remember you’re looking for the games executable folder, it might not necessarily be where you expect it to be. For Trials Fusion, for instance, the path on my machine was D:\Program Files (x86)\Ubisoft\Trials Fusion\datapack. Once you have the file path, click on the “Add” button in Mediator (the one on the left of the window). You now need to browse to your games executable folder and select the correct program file. Once you have done this, the window should look like the one shown below.
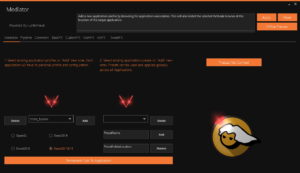
Mediator will try to detect the correct version of DirectX or OpenGL that the executable uses, most times it will get this correct, so only override this setting if you’re certain. Click on “Confirm” (or “Update” if that’s what the button says on your PC). After a short wait, the window should look like the one shown below.
Click on the box that says “PresetName”. Delete the text and name it “Default”, then, click on “Add”. You only need do this step once, next time you configure a game this default preset will already be available. Use the drop down box on the right and choose “Default” from the list.
All that remains now is to click on “Permanent Push To Application”. When you do this, the box in the top of the Mediator window should say “Configuration successfully pushed to the profiled application”. We’re now done with Mediator, so close it or minimise it and go back to the games installation folder. In the folder you should now see some new files, including a ReShade sub-folder. Open this folder and find the file called “SweetFX.cfg”. Open this in Notepad or your favourite text editor. We assume most of you should understand how to edit text files, but just in case here’s a link to a tutorial that explains it. What you need to do is empty this file completely. In your text editor of choice, right click and choose “select all” and then press the delete key. Now, open the preset text file you downloaded earlier. Simply select everything in this document and copy and paste it into the SweetFX.cfg. Now, save the file. If you have trouble saving the file it’s probably due to file permissions. Set the file permissions on the ReShade sub-folder so that you have read/write access. There’s a tutorial on how to do that here.
Running your ReShaded game
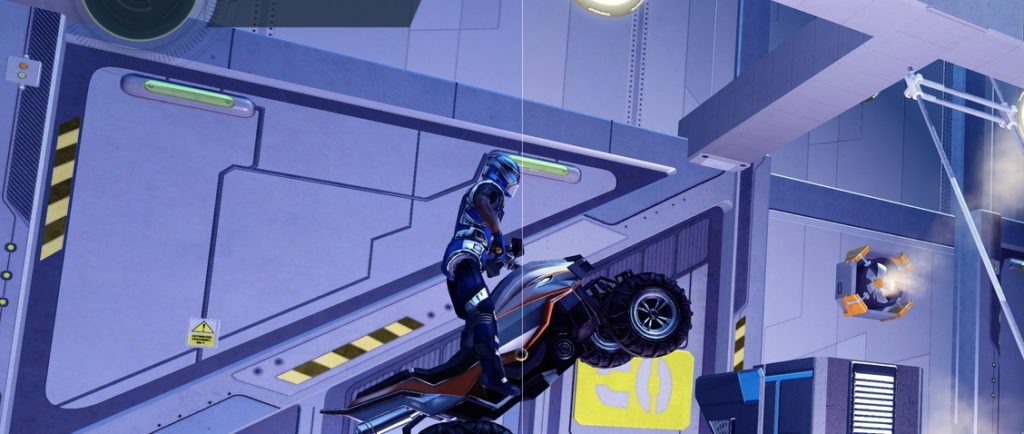
At this point you’re ready to try your game. Simply start it as normal. You should see immediately if ReShade has worked, as an overlay message will appear letting you know that it is running. If everything is working, you should see “Compiling effect…succeeded!” in the top left hand corner of the screen. Often though, there will be some errors or omissions in the preset file, particularly with older presets designed for previous versions of SweetFX. If you encounter an error, it’s typically quite easy to fix. First make a note of the error then quit your game or simply alt-tab out of it and use the notes below to troubleshoot the configuration files. Here are some of the most common errors we encountered when using presets.
Undeclared identifier ‘LumaSharpen_toggleKey’ (or similar) – Older versions of SweetFX had one key to toggle effects on or off, but newer versions have the option to configure multiple keys to toggle different parts of the post processing. If you come across an error like this, add the following line into the games SweetFX.cfg file (the one you pasted the preset into).
#define LumaSharpen_ToggleKey RFX_ToggleKey
Obviously if you’re getting a different undeclared identifier, you will want to define the appropriate key based on the error you’re encountering. It shouldn’t matter whereabouts in the file you put this definition, though putting it in the appropriate section wouldn’t hurt. For instance, the LumaSharpen_ToggleKey should go in the “LumaSharpen settings” section. If you’re wondering where RFX_ToggleKey is defined and what it is defined as, you can find it in the file “Common.cfg”, where it is defined as VK_SCROLL or in other words the scroll lock key.
Error: Redefining defined variable – This simply means that one of the variables in the preset you’re trying to use is defined elsewhere in the SweetFX/ReShade configuration files. There are several variables defined in the “CustomFX.cfg” and “BasicFX.cfg” files that are often defined in preset files you may download. All you need to do is find the variable and comment it out by putting two forward slashes in front of it. For instance, with the Trials Fusion config, we got the error “Error: Redefining defined variable GaussSigma”. To fix this, you need to open the file CustomFX.cfg and find the following line:-
#define GaussSigma 1 //[1|2|3|4] //-Makes the blur and sharpening radius wider. Only works when GaussQuality is set to 1 or higher.
Then, simply comment out the line by changing it to:-
//#define GaussSigma 1 //[1|2|3|4] //-Makes the blur and sharpening radius wider. Only works when GaussQuality is set to 1 or higher.
Repeat the commenting out process for any other redefined variables. When you are done, save the file and then launch your game again. Actually, you don’t even need to exit the game to make these changes, you can simply minimise your game, change the files and then go back into your game again. Once you work out all the bugs you should get the “Compiling effect … succeeded!” message.
ReShade limitations
There are some drawbacks to using ReShade that you should be aware of. First of all, you might expect that there was a significant performance hit to using the software, but in actual fact that’s rarely the case. The SMAA (Enhanced Subpixel Morphological Antialiasing) feature does impact performance some, but most of the colour correction/tweaking facilities barely have any impact on performance.
The biggest drawback is where in-game tools are concerned. Particularly in-game overlays like Steam, uPlay, Evolve or Raptr. We tested the Evolve overlay with several ReShade presets, in some games the overlay seemed to work fine, but struggled to take screenshots. Sometimes the tool failed to take the screenshot at all and other times it took the screenshot without the post-processing effects. In other games, the game would simply crash on startup if Evolve was enabled. If your usual game overlay can’t take screenshots correctly, you can simply use the screenshot key in ReShade. This is mapped by default to the Print Screen key and saves the screenshot in the same directory as the game itself. If your game is installed in the program files or program files (x86) folder, you probably will want to change this behaviour to avoid file permission problems. To change the screenshot folder, locate the file “ReShade.fx”. This file should be in the same directory as your games executable. Edit it with your text editor of choice and add the following line near the top of the file:-
#pragma reshade screenshot_location "C:\\Users\\Bucko\\Pictures\\reshade\\Trials Fusion"
Obviously, substitute “C:\\Users\\Bucko\\Pictures\\reshade\\Trials Fusion” with the path to your desired folder. Notice the double back slashes, this isn’t a mistake, that’s how they should appear in the text file. Save the file once you’re done editing it and your screenshots will appear in your chosen folder (assuming you entered the path correctly). As for recording videos, the popular game capture tool Nvidia Shadowplay seemed to work just fine in our tests, though some users have reported problems. Using tools like this, you might find that they record the gameplay footage without the ReShade post-processing effects however.


They really need to change the Toggle-effect button for Reshade cause my PC doesn’t have a Scroll-Lock key…and yes iv’e used the on-screen keyboard and the question was then how the hell are we suppose to enable (press “Scroll-Lock”) if the on-screen keyboard can’t pop-up due to the game loading up.
help would be obliged
Came here to see configuration of settings, not some old description which are self explanatory and easily done just following the reshade mediator, utter waste of time and a fucking clickbait….all the steps mentioned above come with the reshade editor itself, nothing extra…totally crap…not worth being called a TUTORIAL, more like an overview
Thank you for your highly constructive criticism.
Hi there
I just wanted to thank you for this amazing thread. I was not experiencing any difficulties but it still helped me to confirm some things i was doing at reshade.
Keep up the good work